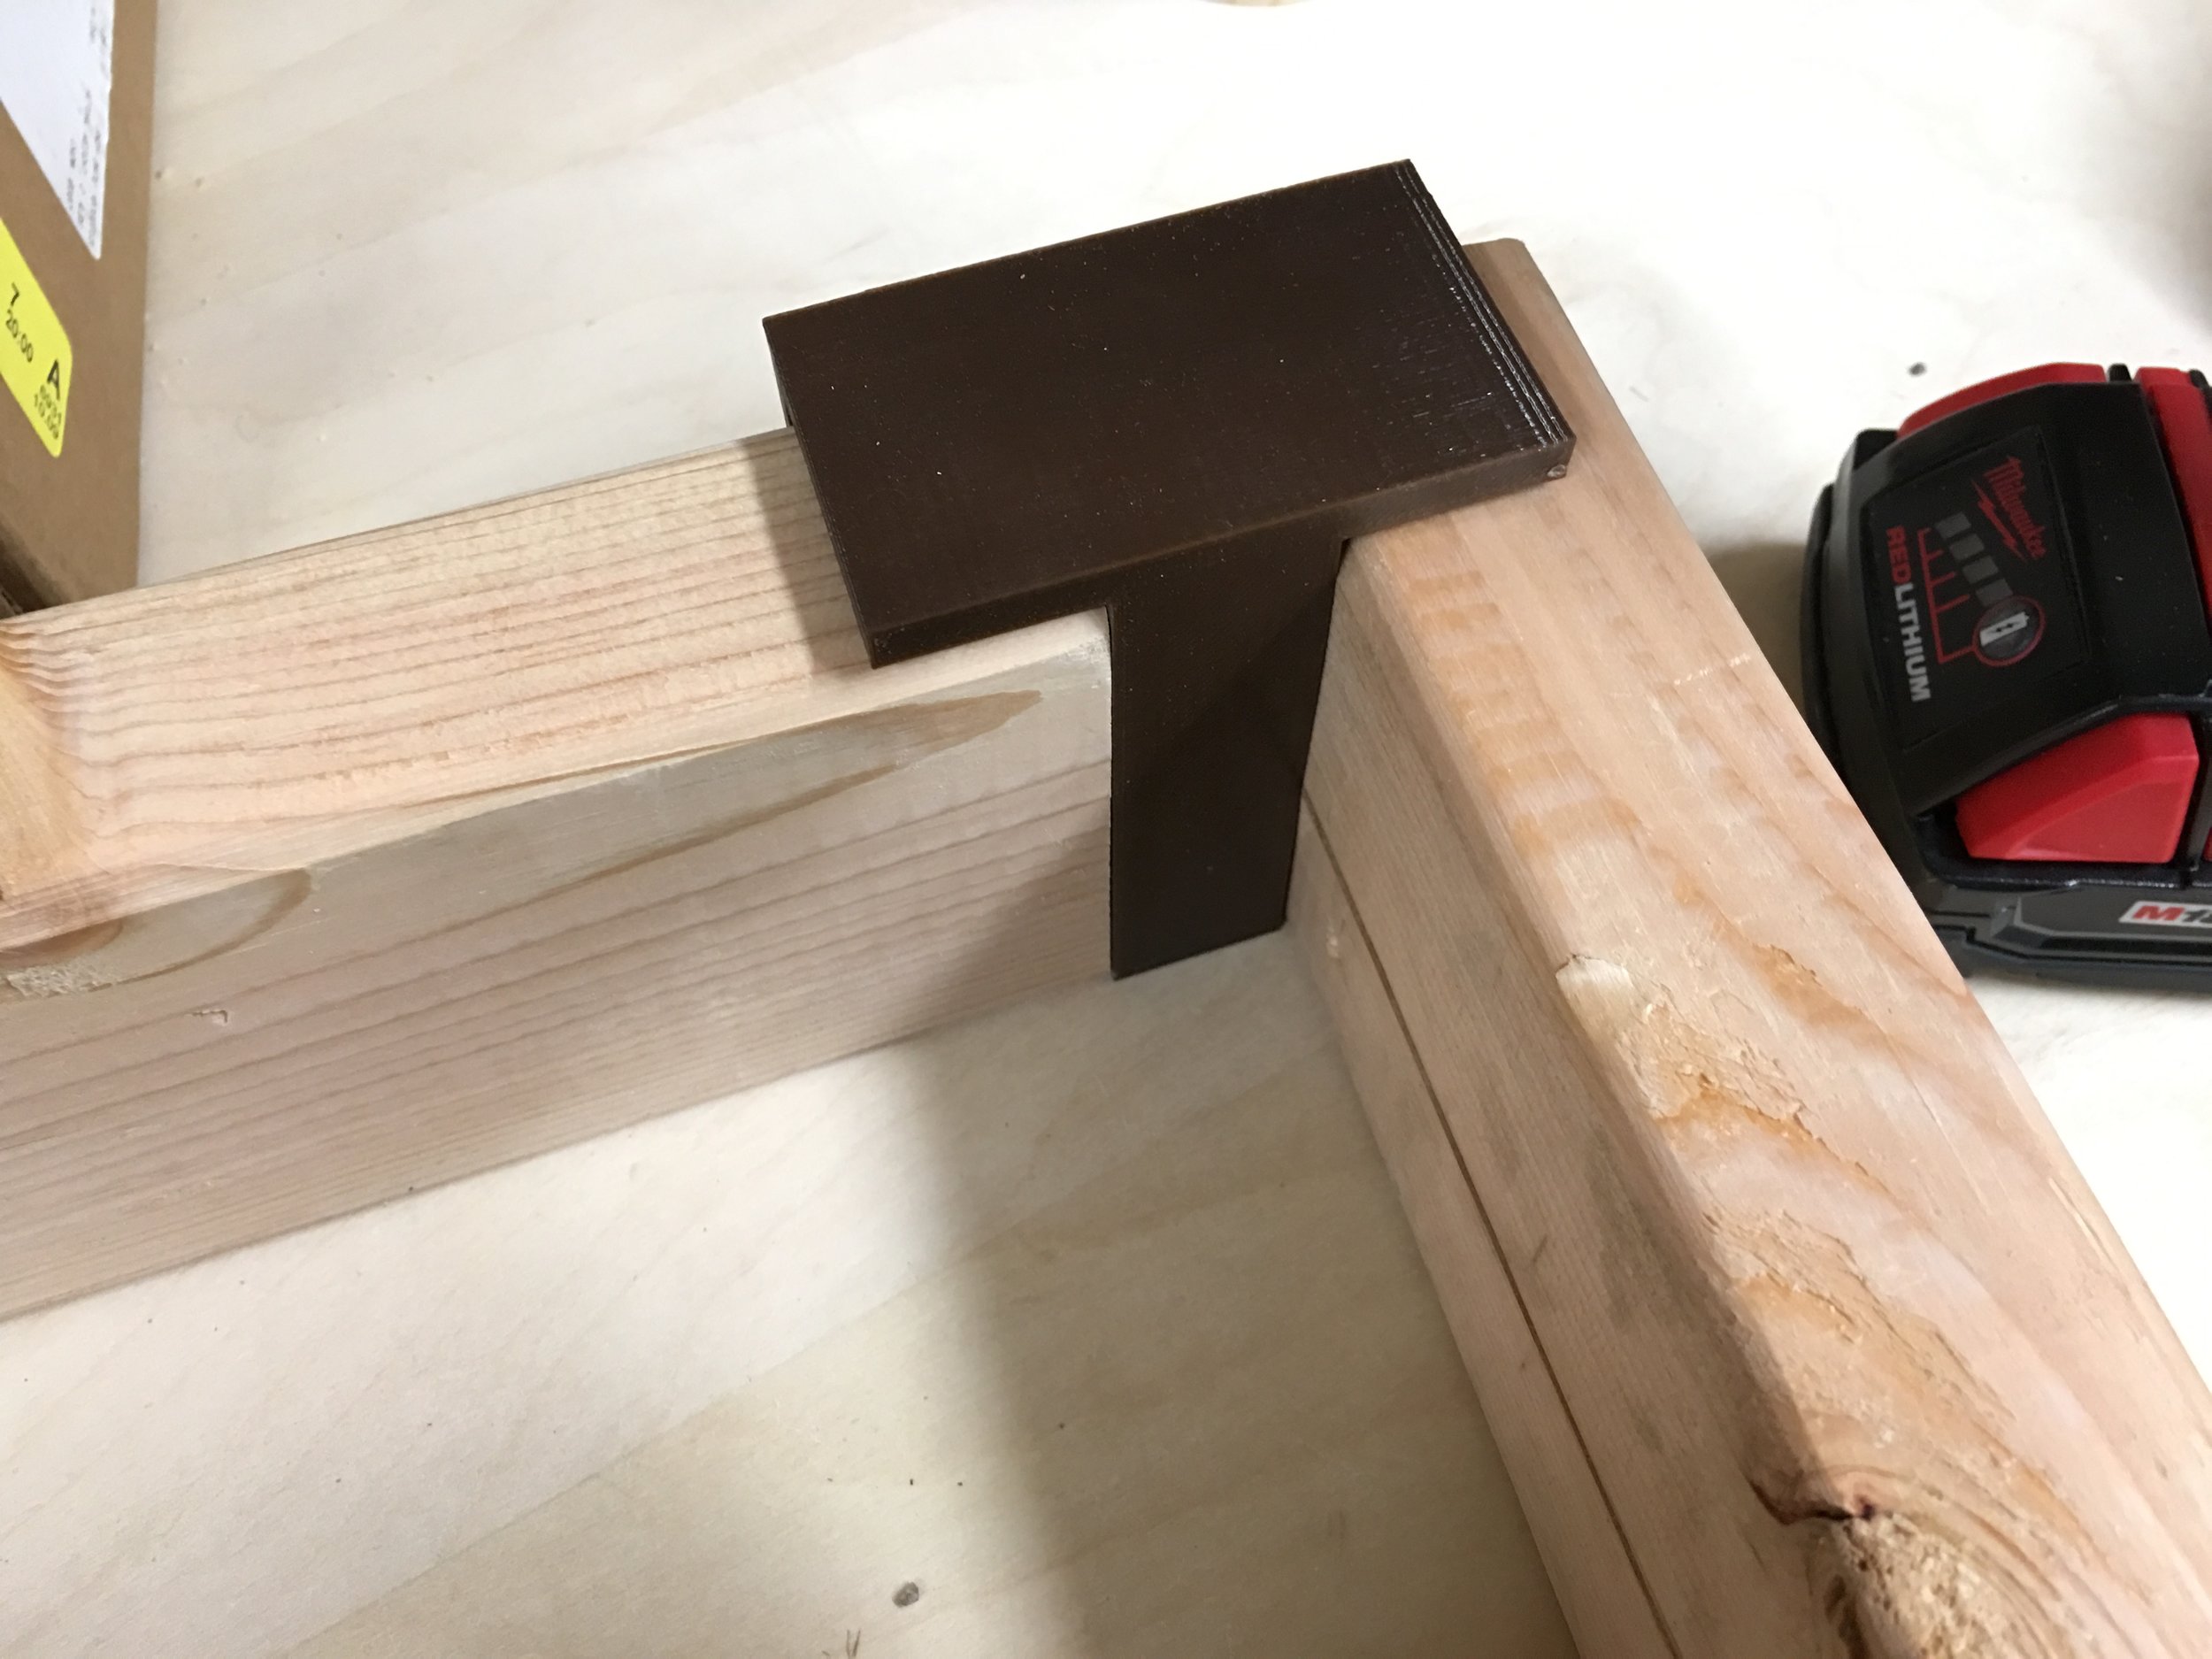
I've entered this tutorial into two Instructables contests. Please consider voting for it by signing up for a free Instructables account, heading over to my Instructable, then voting for it in the upper right corner (or on mobile at the very bottom).
A couple months ago, I decided to make a table. I knew that I wanted to keep it simple both in looks and in effort required to make it, but still wanted it to be sturdy and last forever. I envisioned using standard dimensional lumber from my local hardware store. I wanted to use 2x4s for the apron, 4x4s for the legs and 2x8s for the table top.
Before I started the project I had to decide what kind of joints to use in the assembly. Mortise and tenon joints, while strongest and seemingly the preferred joint by serious woodworkers, required both a table saw and router along with a chisel to round out the tenons or square out the mortises. Overall, they seemed like too much work compared to the ease of pocket screw joints. Pocket screws, though, don't create a very strong joint compared to a mortise and tenon joint. Dowel joints seemed like a good compromise between ease and strength. The tricky part with dowel joints, though, is aligning the dowel holes on both pieces. I didn't want to spend all my time drawing out drill marks either. I searched for dowel jigs, but didn't find one that seemed like it would work for what I needed it to do: build a table apron out of 2x4s and 4x4 posts. Maybe I didn't look hard enough, but I like to design things myself, so I decided to design a dowel hole jig that I could 3D print and would forever make it easy for me to make dowel joints. I designed the widget below to be able to customize the dowel jig to any sized lumber.
The default configuration is meant for 2x4s with actual dimensions of 1.5" x 3.5". I used boards straight out of the hardware store without doing anything to them but sanding them. If you want to plane your wood to ensure flatness and parallel faces, you could end up shaving a good 1/2" off of both dimensions of your boards leaving you with 1" x 3" boards. In that case you'll want your dowel holes to be aligned differently. You may want to use different boards entirely, in which case you'll be in the same boat. Below, I'll show you how I used my dowel jigs (I actually made two, one for the 2x4s and one for the 4x4s), and will suggest ways you can tweak the configuration for your setup.
Customizable Widget
Here's the customizable dowel jig widget. Below the widget, you'll find descriptions of what every parameter does. You can click and drag (or swipe on mobile) in the widget to rotate around and use the mouse wheel (or pinch on mobile) to zoom. To download the STL file for your jig, click the Generate STL button in the upper left, then click the Download STL button.
Dowel Diameter - There are a number of different sizes for dowel pins. I've read that you want to use a diameter that is about 1/3 the thickness of your board, but there are a lot of differing opinions. I used 3/8" dowel pins, which is a little smaller than that suggestion. Whatever pins you choose, input their diameter here. Make sure you have a drill bit and drill stop that are the same size!
Dowels - I haven't found much in the way of suggestions for the number of dowels. 3 is probably a good place to start, but you can input whatever number makes sense to you. Whatever you choose, the center of the dowels will be evenly spaced along the width of your board.
Offset - From what I could find online, dowel pins are usually all lined up in a straight line. It seemed to me that offsetting them a little would result in a joint more capable of handling a little torquing. I could be totally wrong, and if you want all your dowels to be in a straight line go ahead and set this to 0. Setting this to a number larger than 0 will result in every other dowel hole being offset that far above and below the centerline of the board.
Width - The actual width of your board. For a 2x4 this is 3.5".
Height - The thickness of your board. For a 2x4 this is 1.5".
Depth - This is the depth of your dowel jig. Your drill bit will need to be long enough to fit through this amount of material, plus the desired depth of your hole. Lower this number to save print time at the expense of a potentially less aligned hole (the thicker the material, the less likely you are to tilt your bit into the plastic material).
Extra Height - This value will offset all your dowel holes up by this amount, adding extra height to the jig. I set this value to .375 when making a jig for drilling holes in my 4x4 table legs. This ensured the 2x4 aprons were inset a little from the rounded corner of the 4x4. If you plane your leg and apron boards so they would be flush, you could keep this at 0 and use a single jig.
Extra Width - Similar to Extra Height, just in the other dimension. I haven't used this, but it seemed reasonable that someone might want it.
Wing Sides - I wasn't sure what to call the pieces of the jig that stuck out and ensured alignment with the boards, so I called them wings. This settings allows you to choose whether you want wings on both sides of your jig, or one side or the other (or turn them off completely, but then its not much of a jig). On my jigs, I used wings on both sides, but 3D printing it with the wings flat on the build plate will result in a weak point along the edge where the wings join the main part of the jig. The abuse from using the drill can cause it to break over time by delaminating your layers. You could flip the jig on edge so the holes face up, but you'll need supports if you want both wings, which will make the surface of one side of the jig less smooth. Instead of a single jig, with wings on both sides, you can print out two jigs, one with a wing on one side and the other with the wing on the other and you can print them with the dowel holes facing up, which will result in your jigs being much more resilient to the vibrations of the drill. You can check the Orient Holes Up checkbox to make the holes face up for a stronger print.
Horizontal Wing - Uncheck this if you want to be able to align your jig in the middle of a board. For example, you may want an additional support that connects your two aprons that span the length of your table. You'll need to accurately measure where you place the jig, but you can still clamp it to the board after measuring to ensure good alignment along the width of your board.
Vertical Wing - Similar to Horizontal Wing, but for the other dimension.
Wing Depth - How much you want your jig to overlap with your board. Increasing this value will give you more surface to clamp to and will have a better chance of good alignment. Lowering this value can decrease print times.
Wing Thickness - How thick the wings are. Thinner wings will make your jig weaker overall and any warping while printing will be more likely to cause problems with the jig.
Orient Holes Up - Checking this will orient the dowel holes vertically for a stronger 3D print.
Demonstration
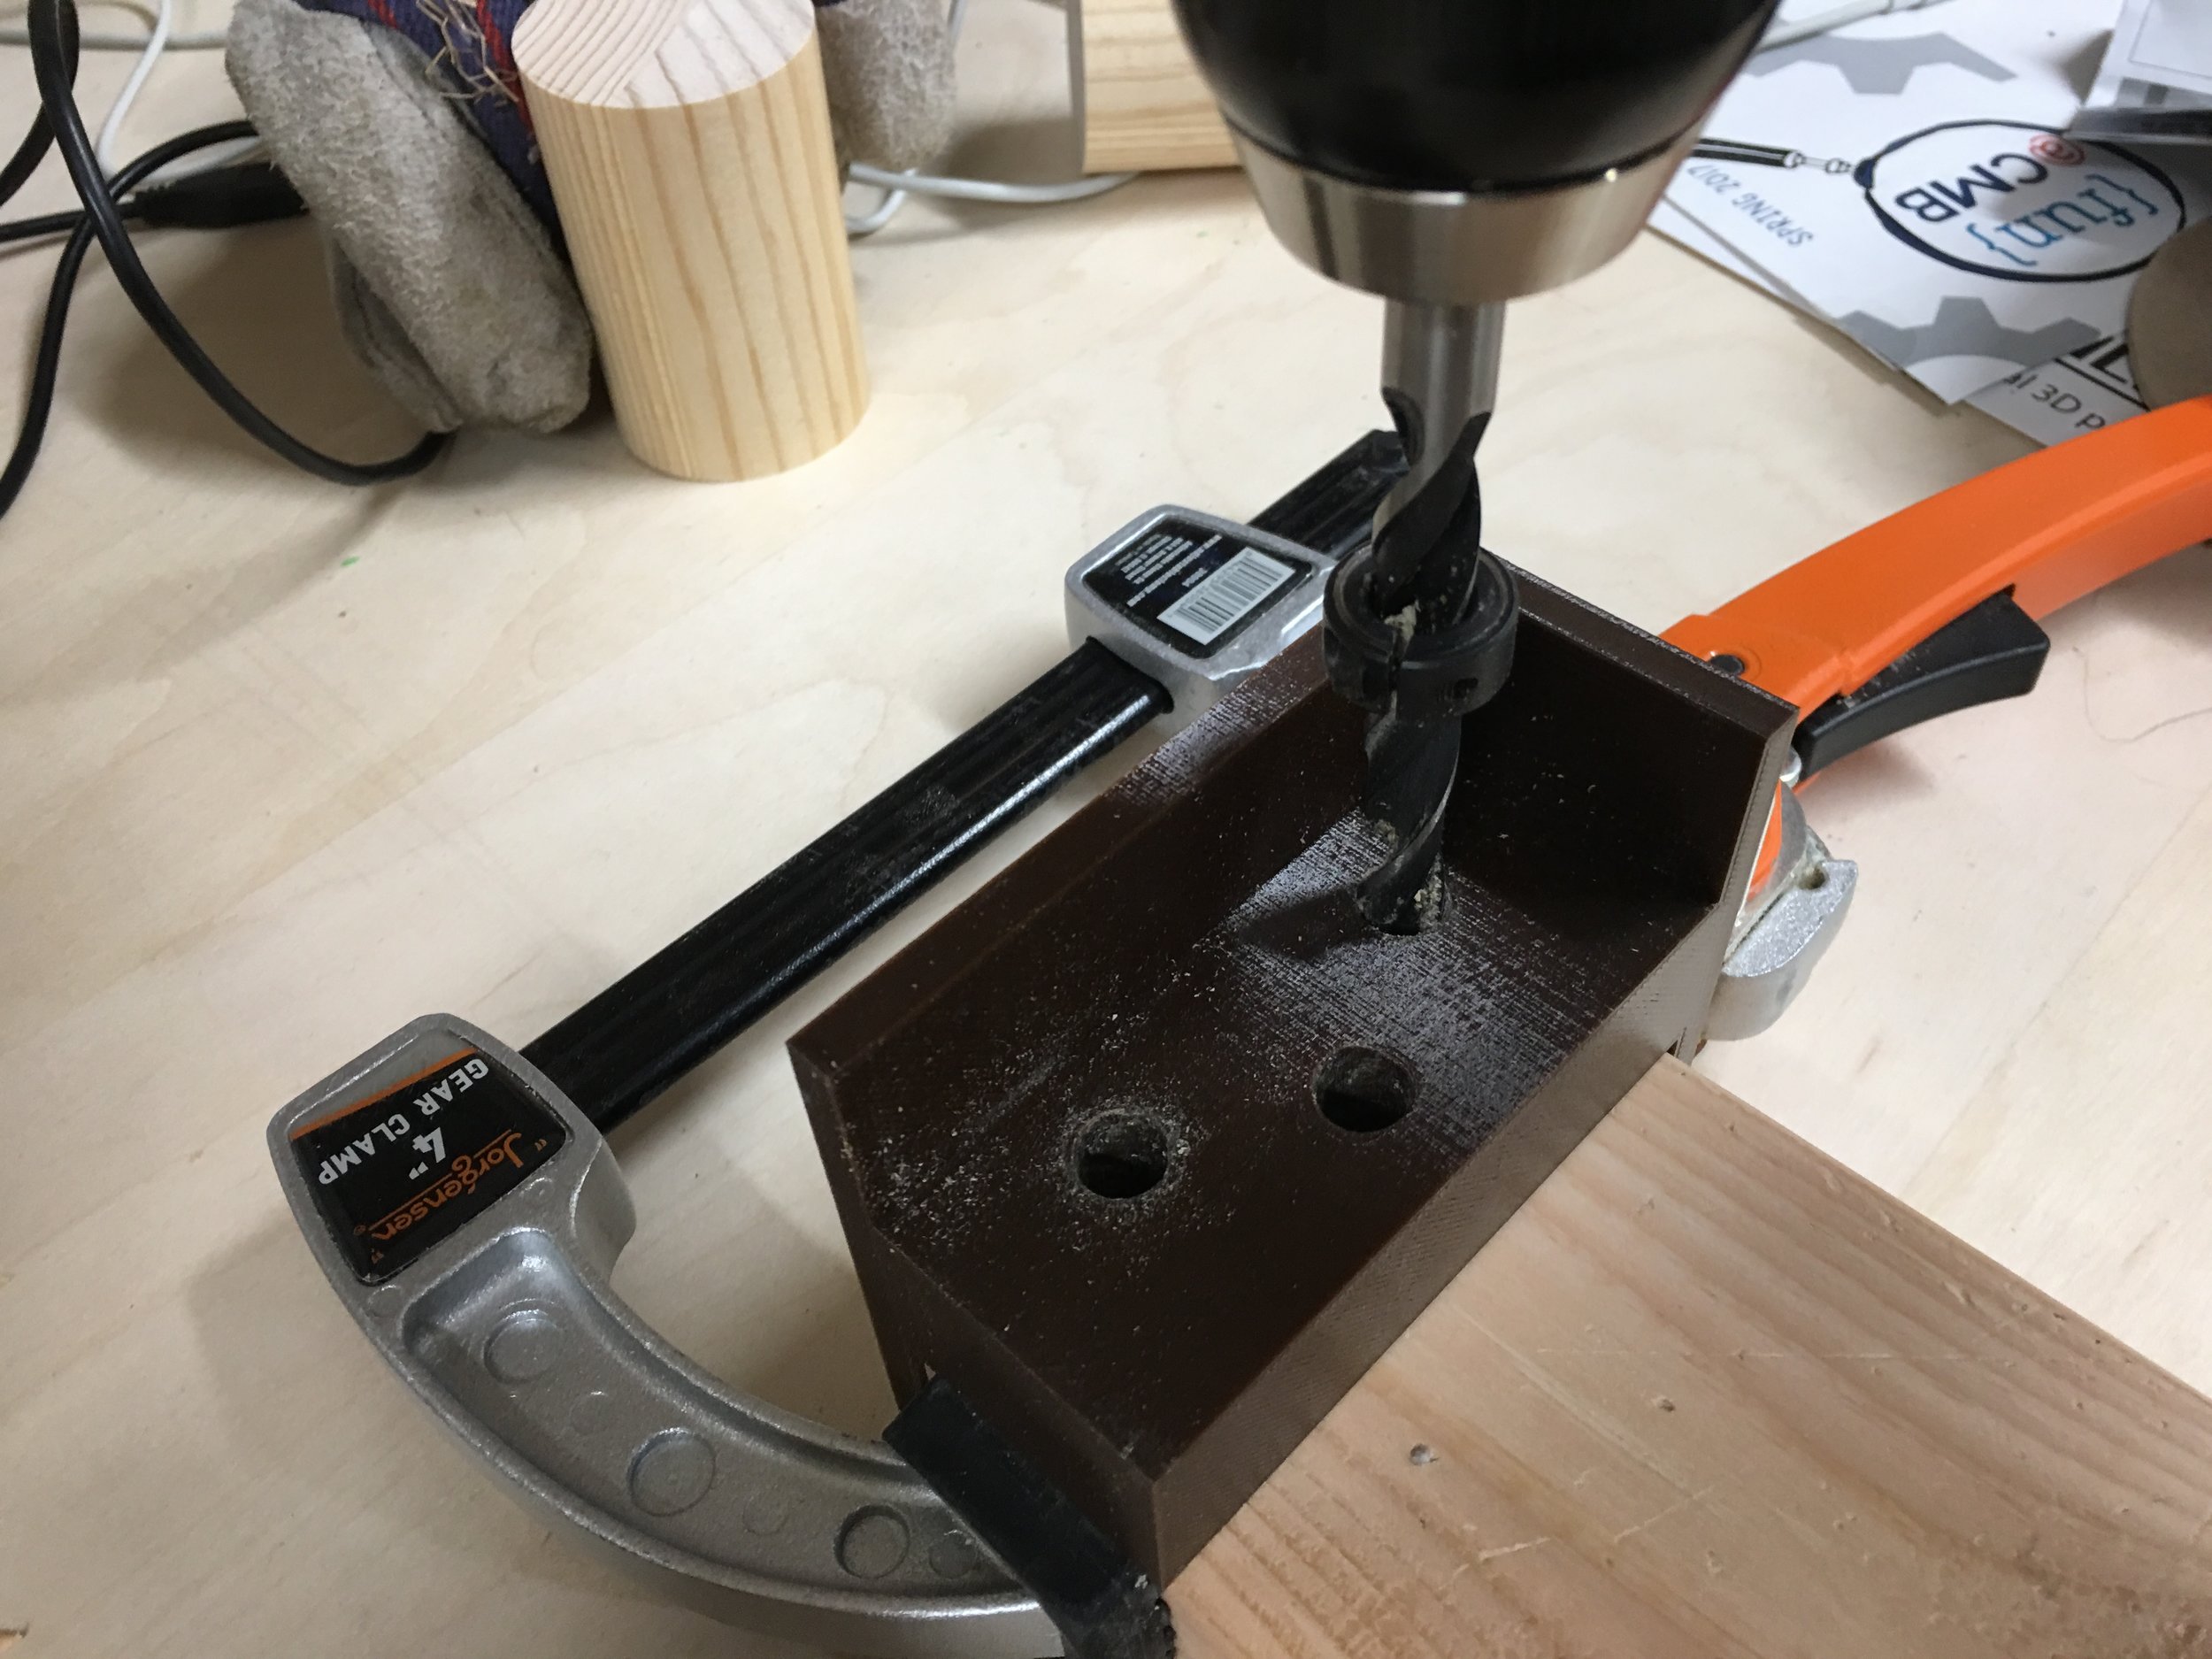
Here's a demonstration of how the dowel jig works. First, you'll need to attach your drill stop to your drill bit. Make sure the drill will fit through the jig with a half dowel length sticking out the other side.
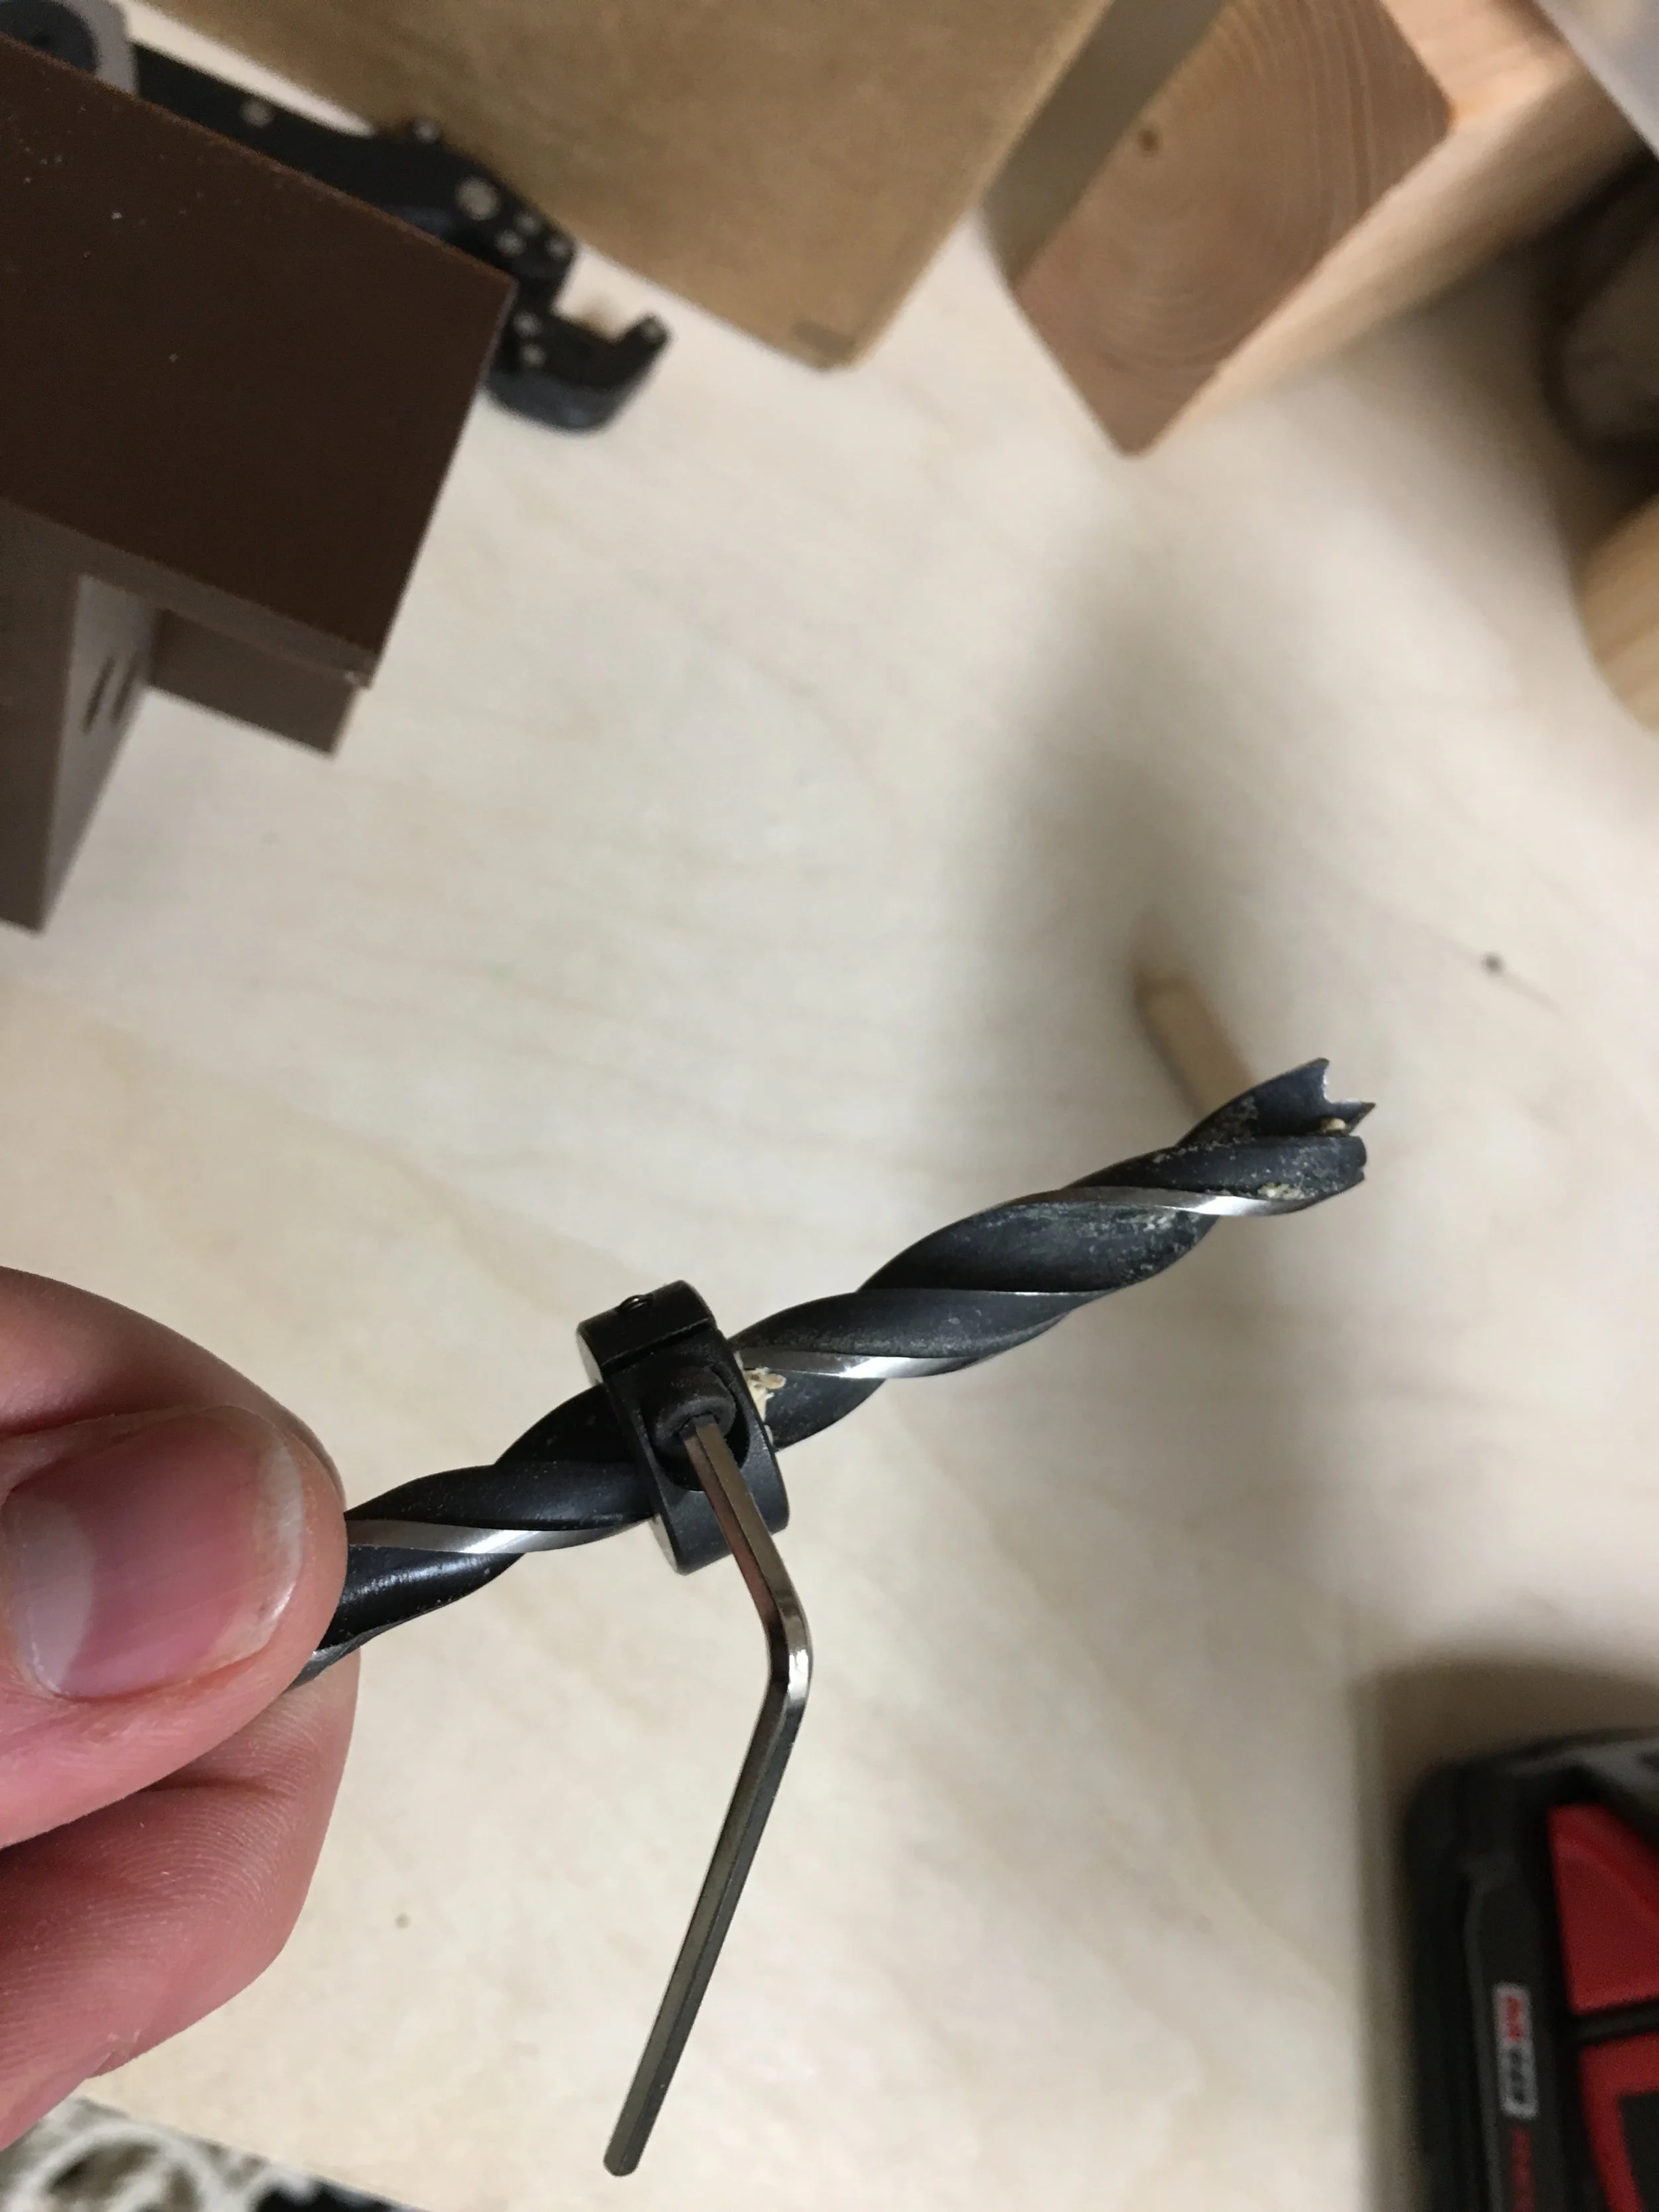
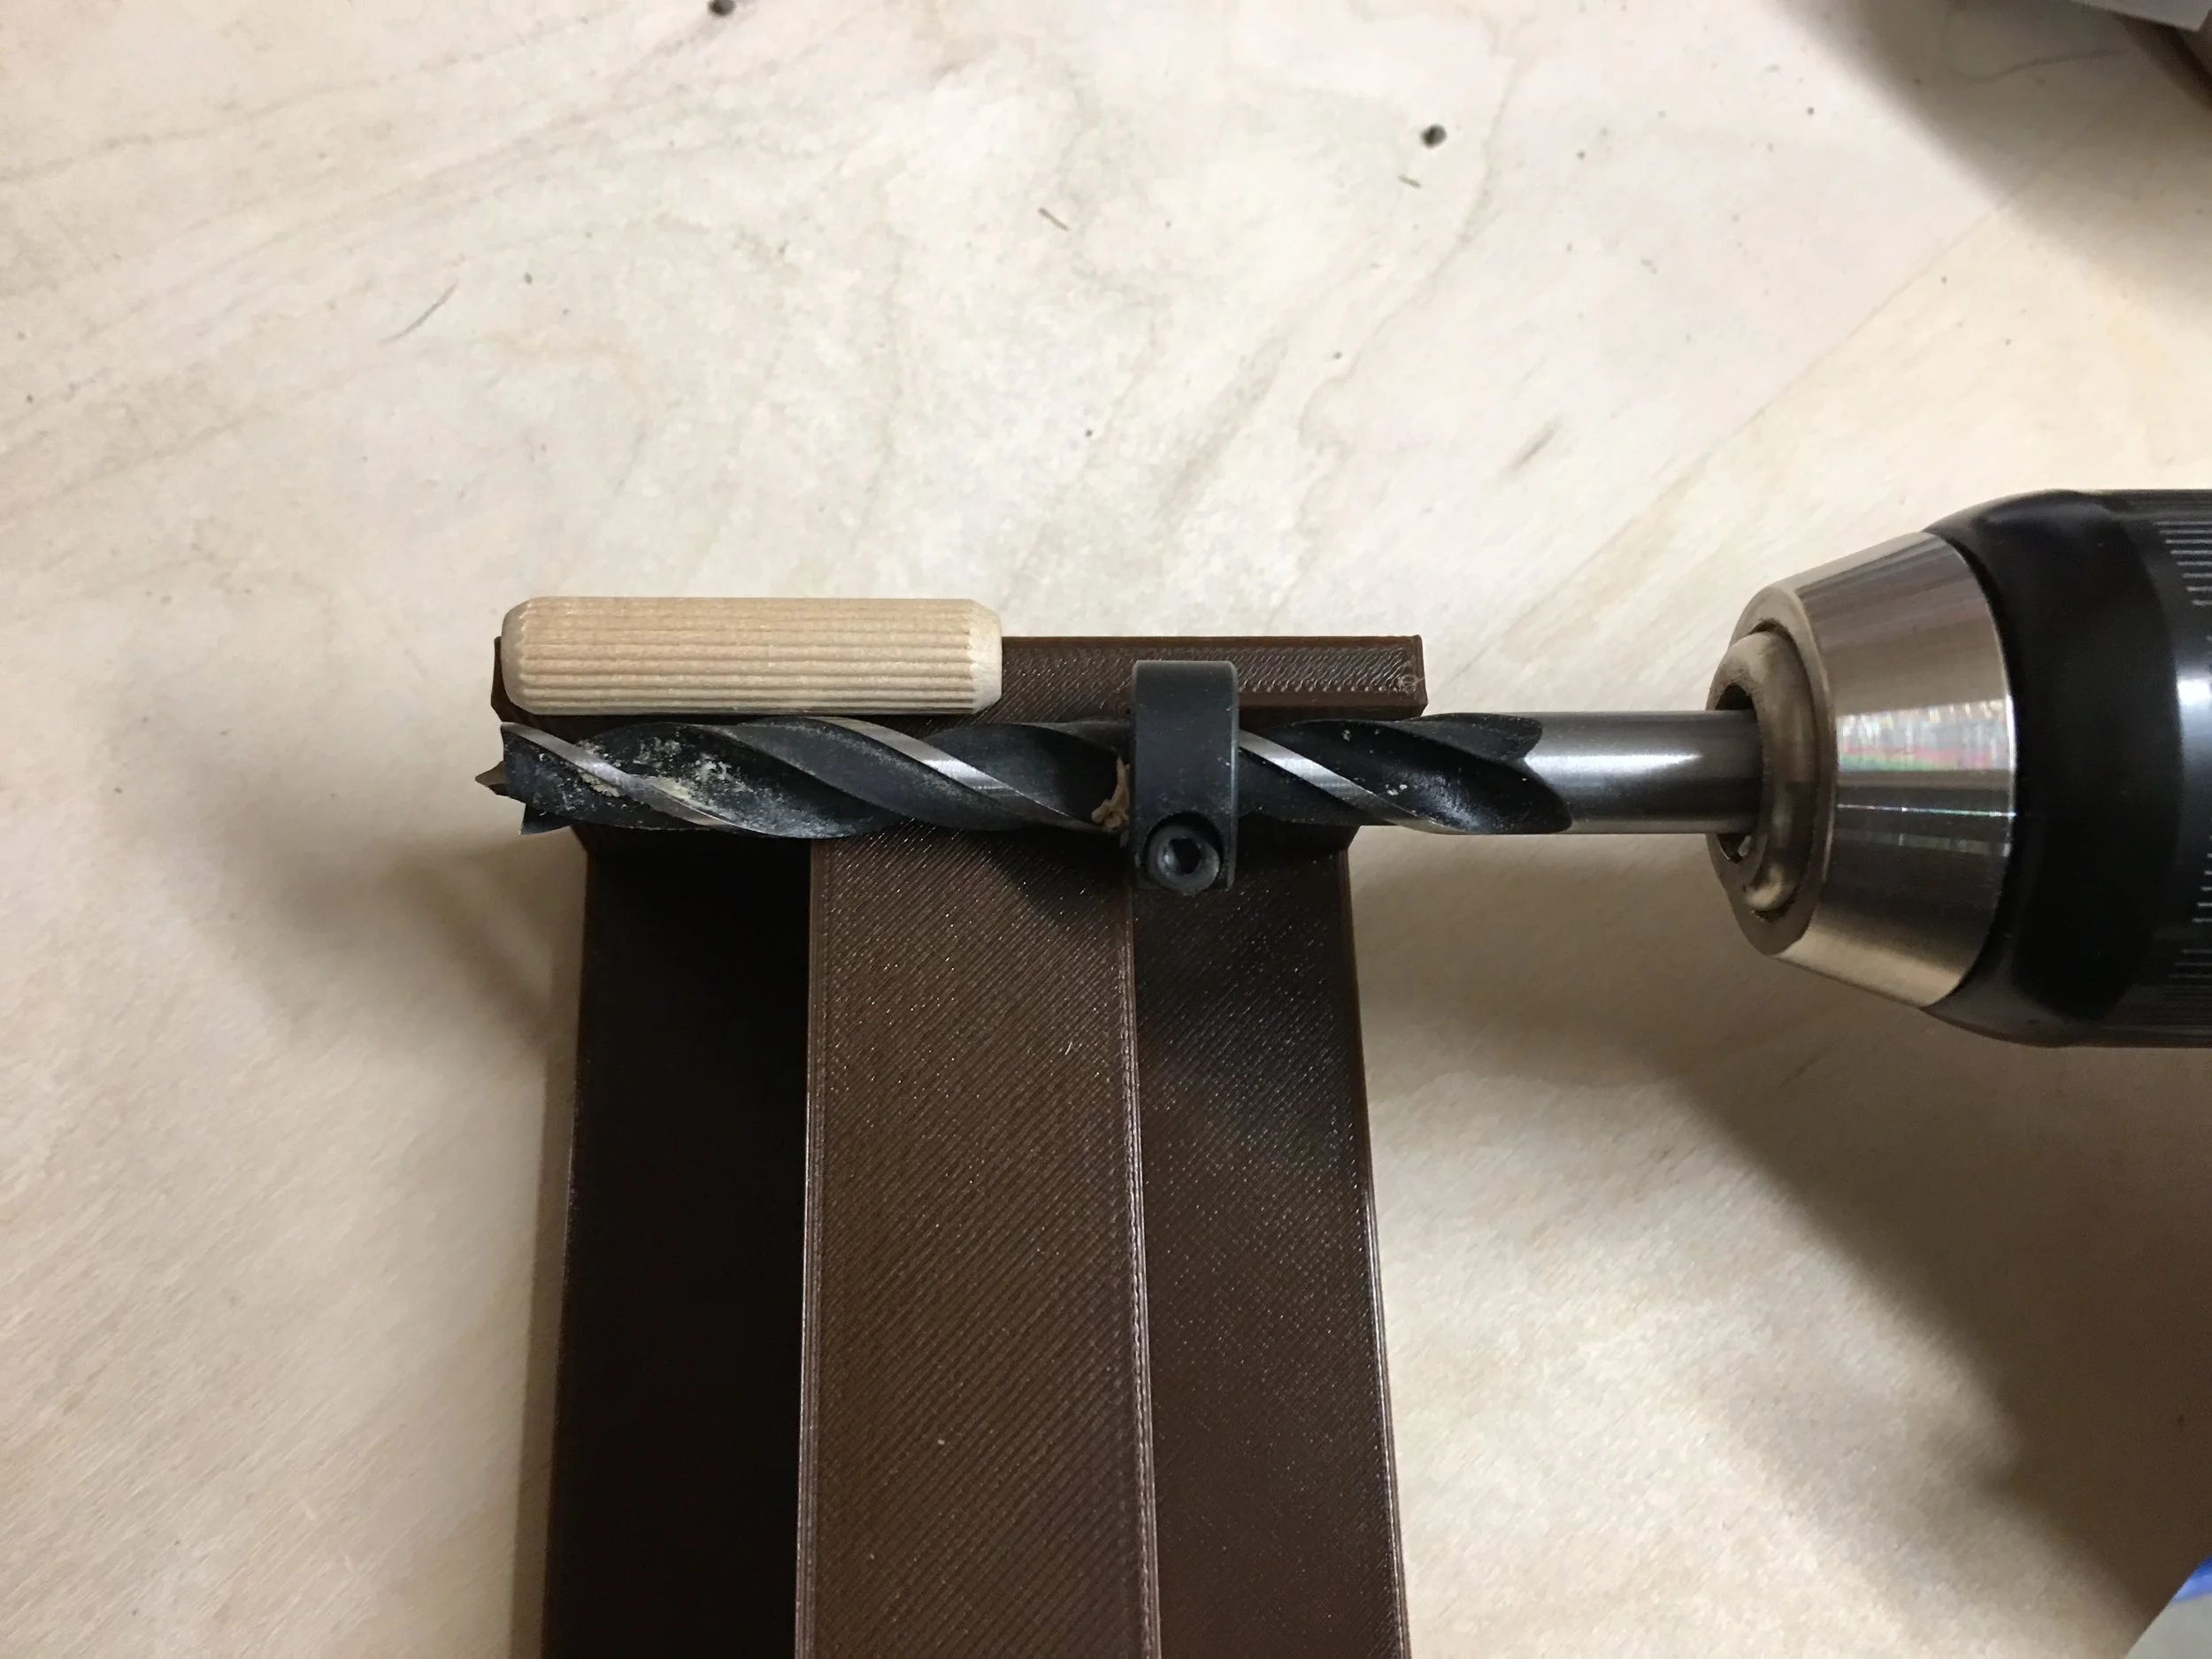
Align your boards how you want them to be joined. Use the wings to align the jig between the boards.
Clamp the jig to one of the boards, making sure the wings are flush on both faces. Drill each hole, remove the clamp and repeat with the other board.
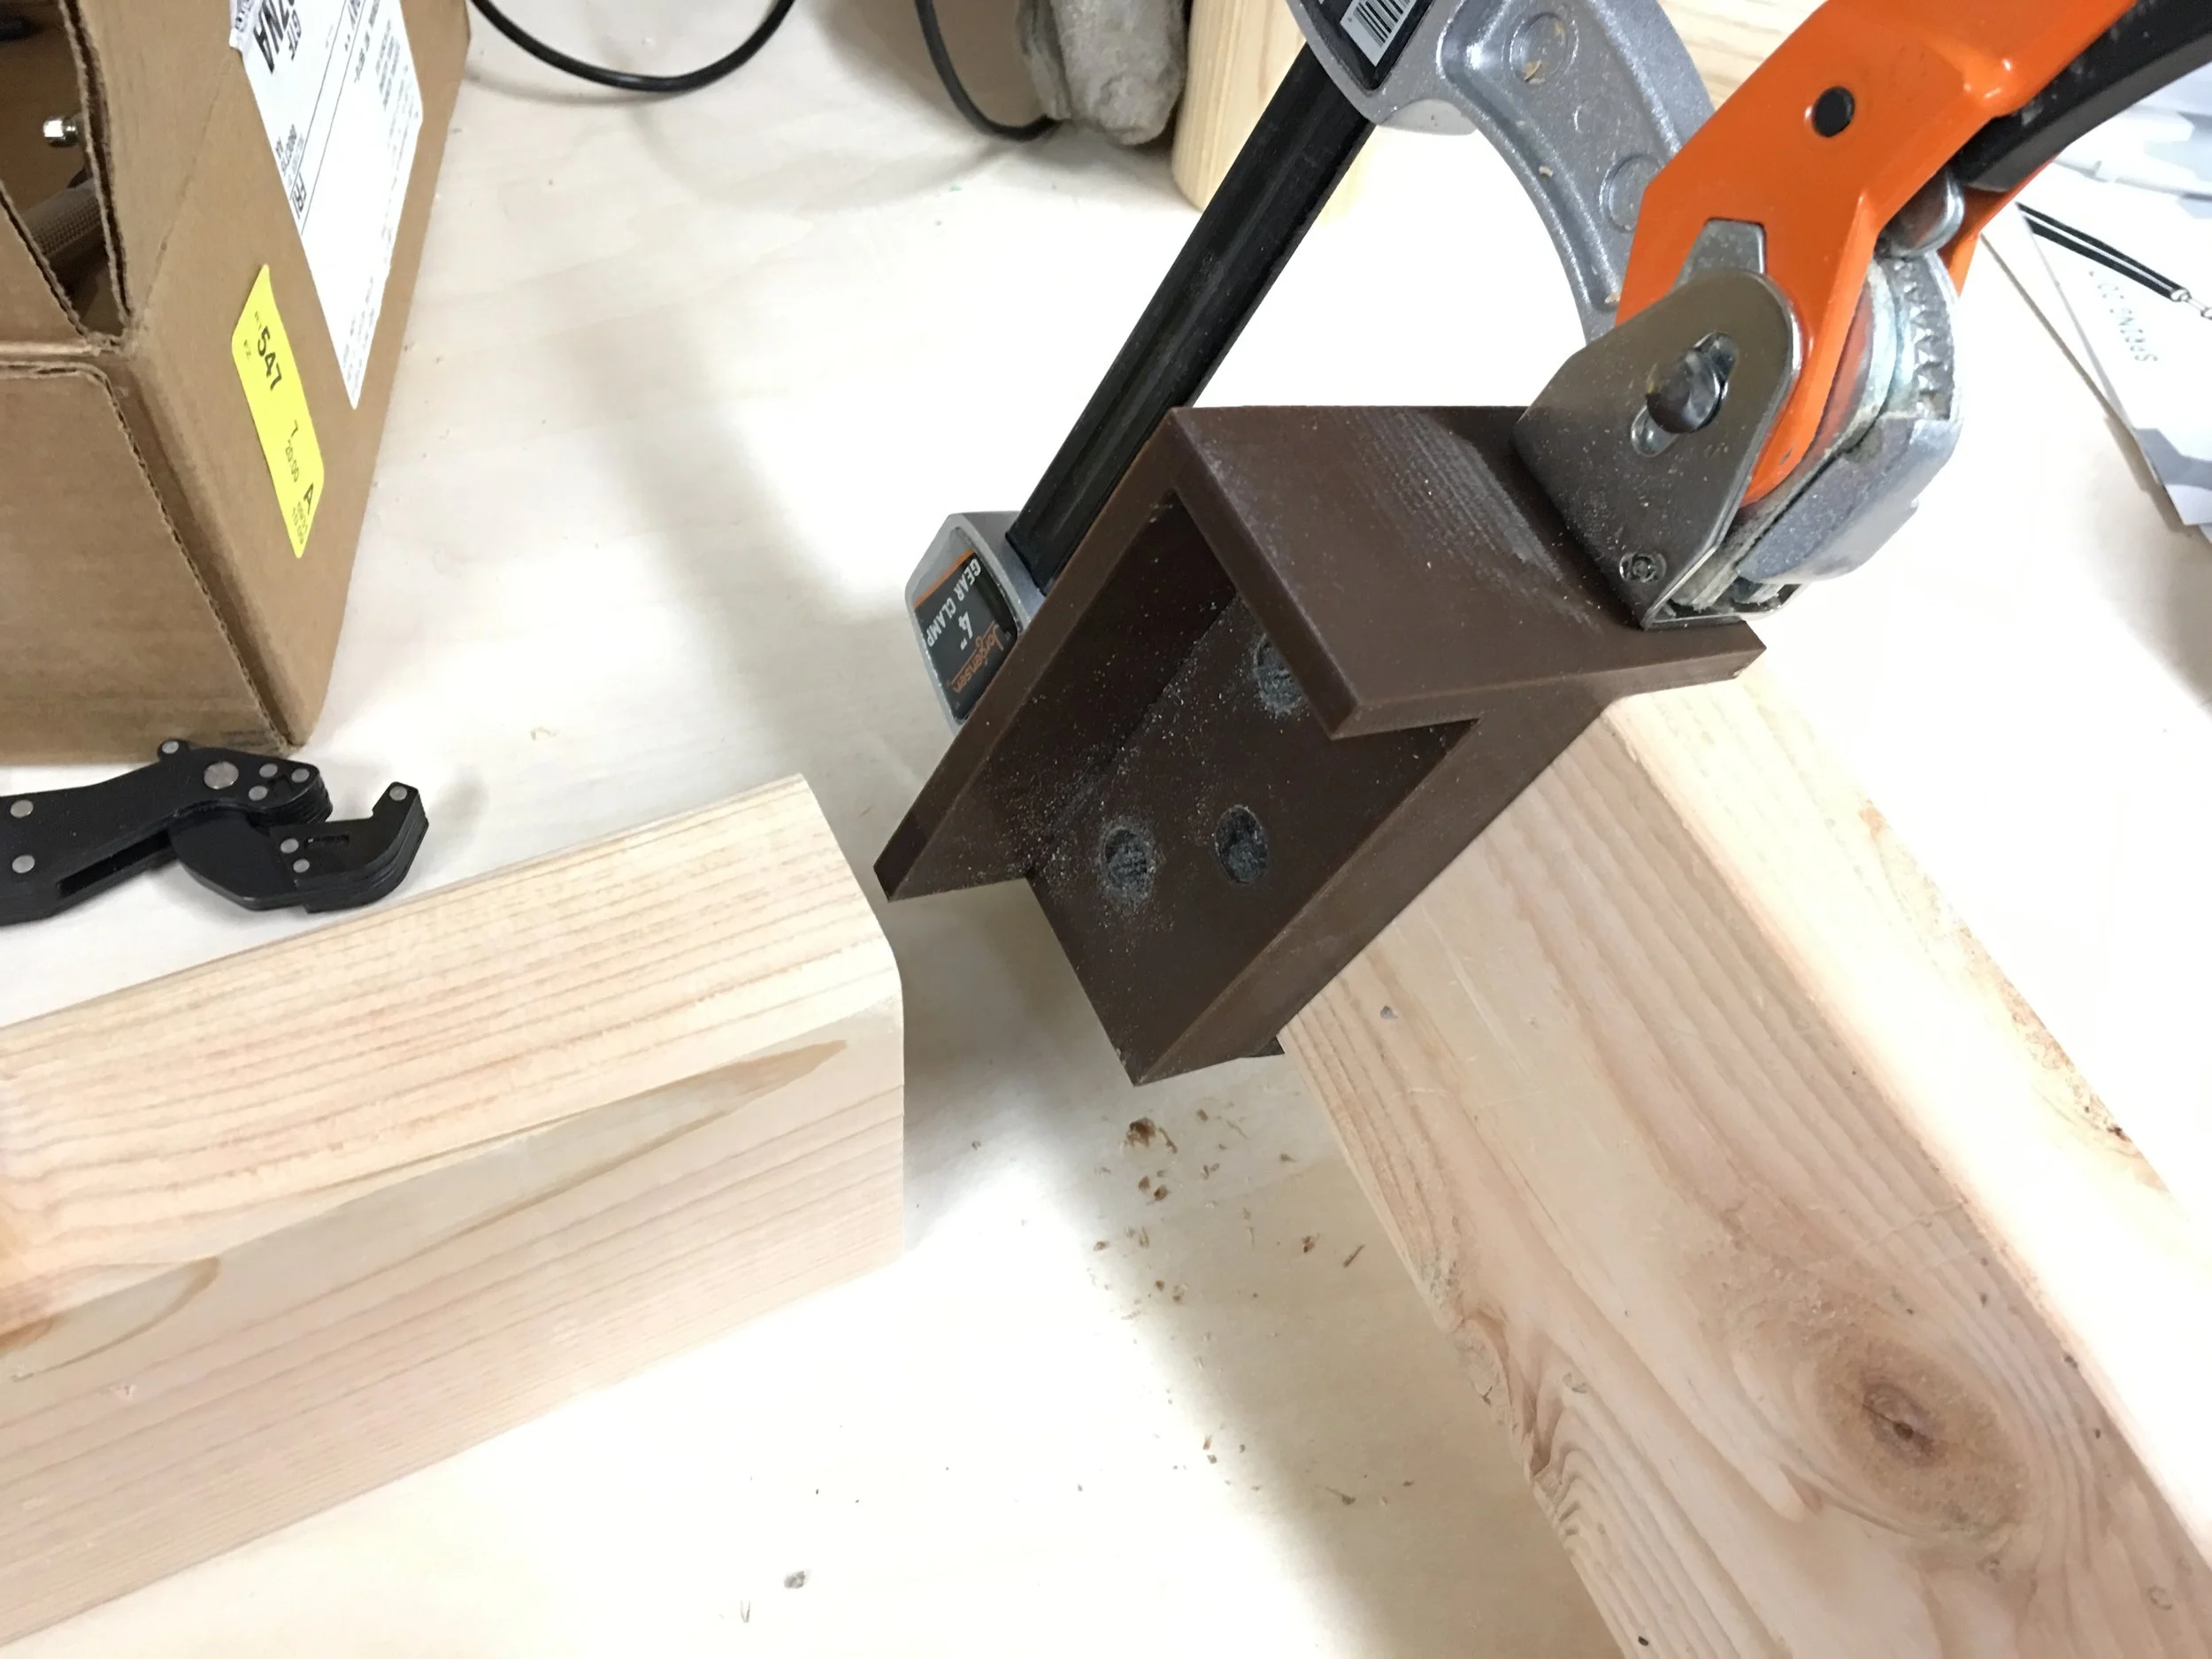
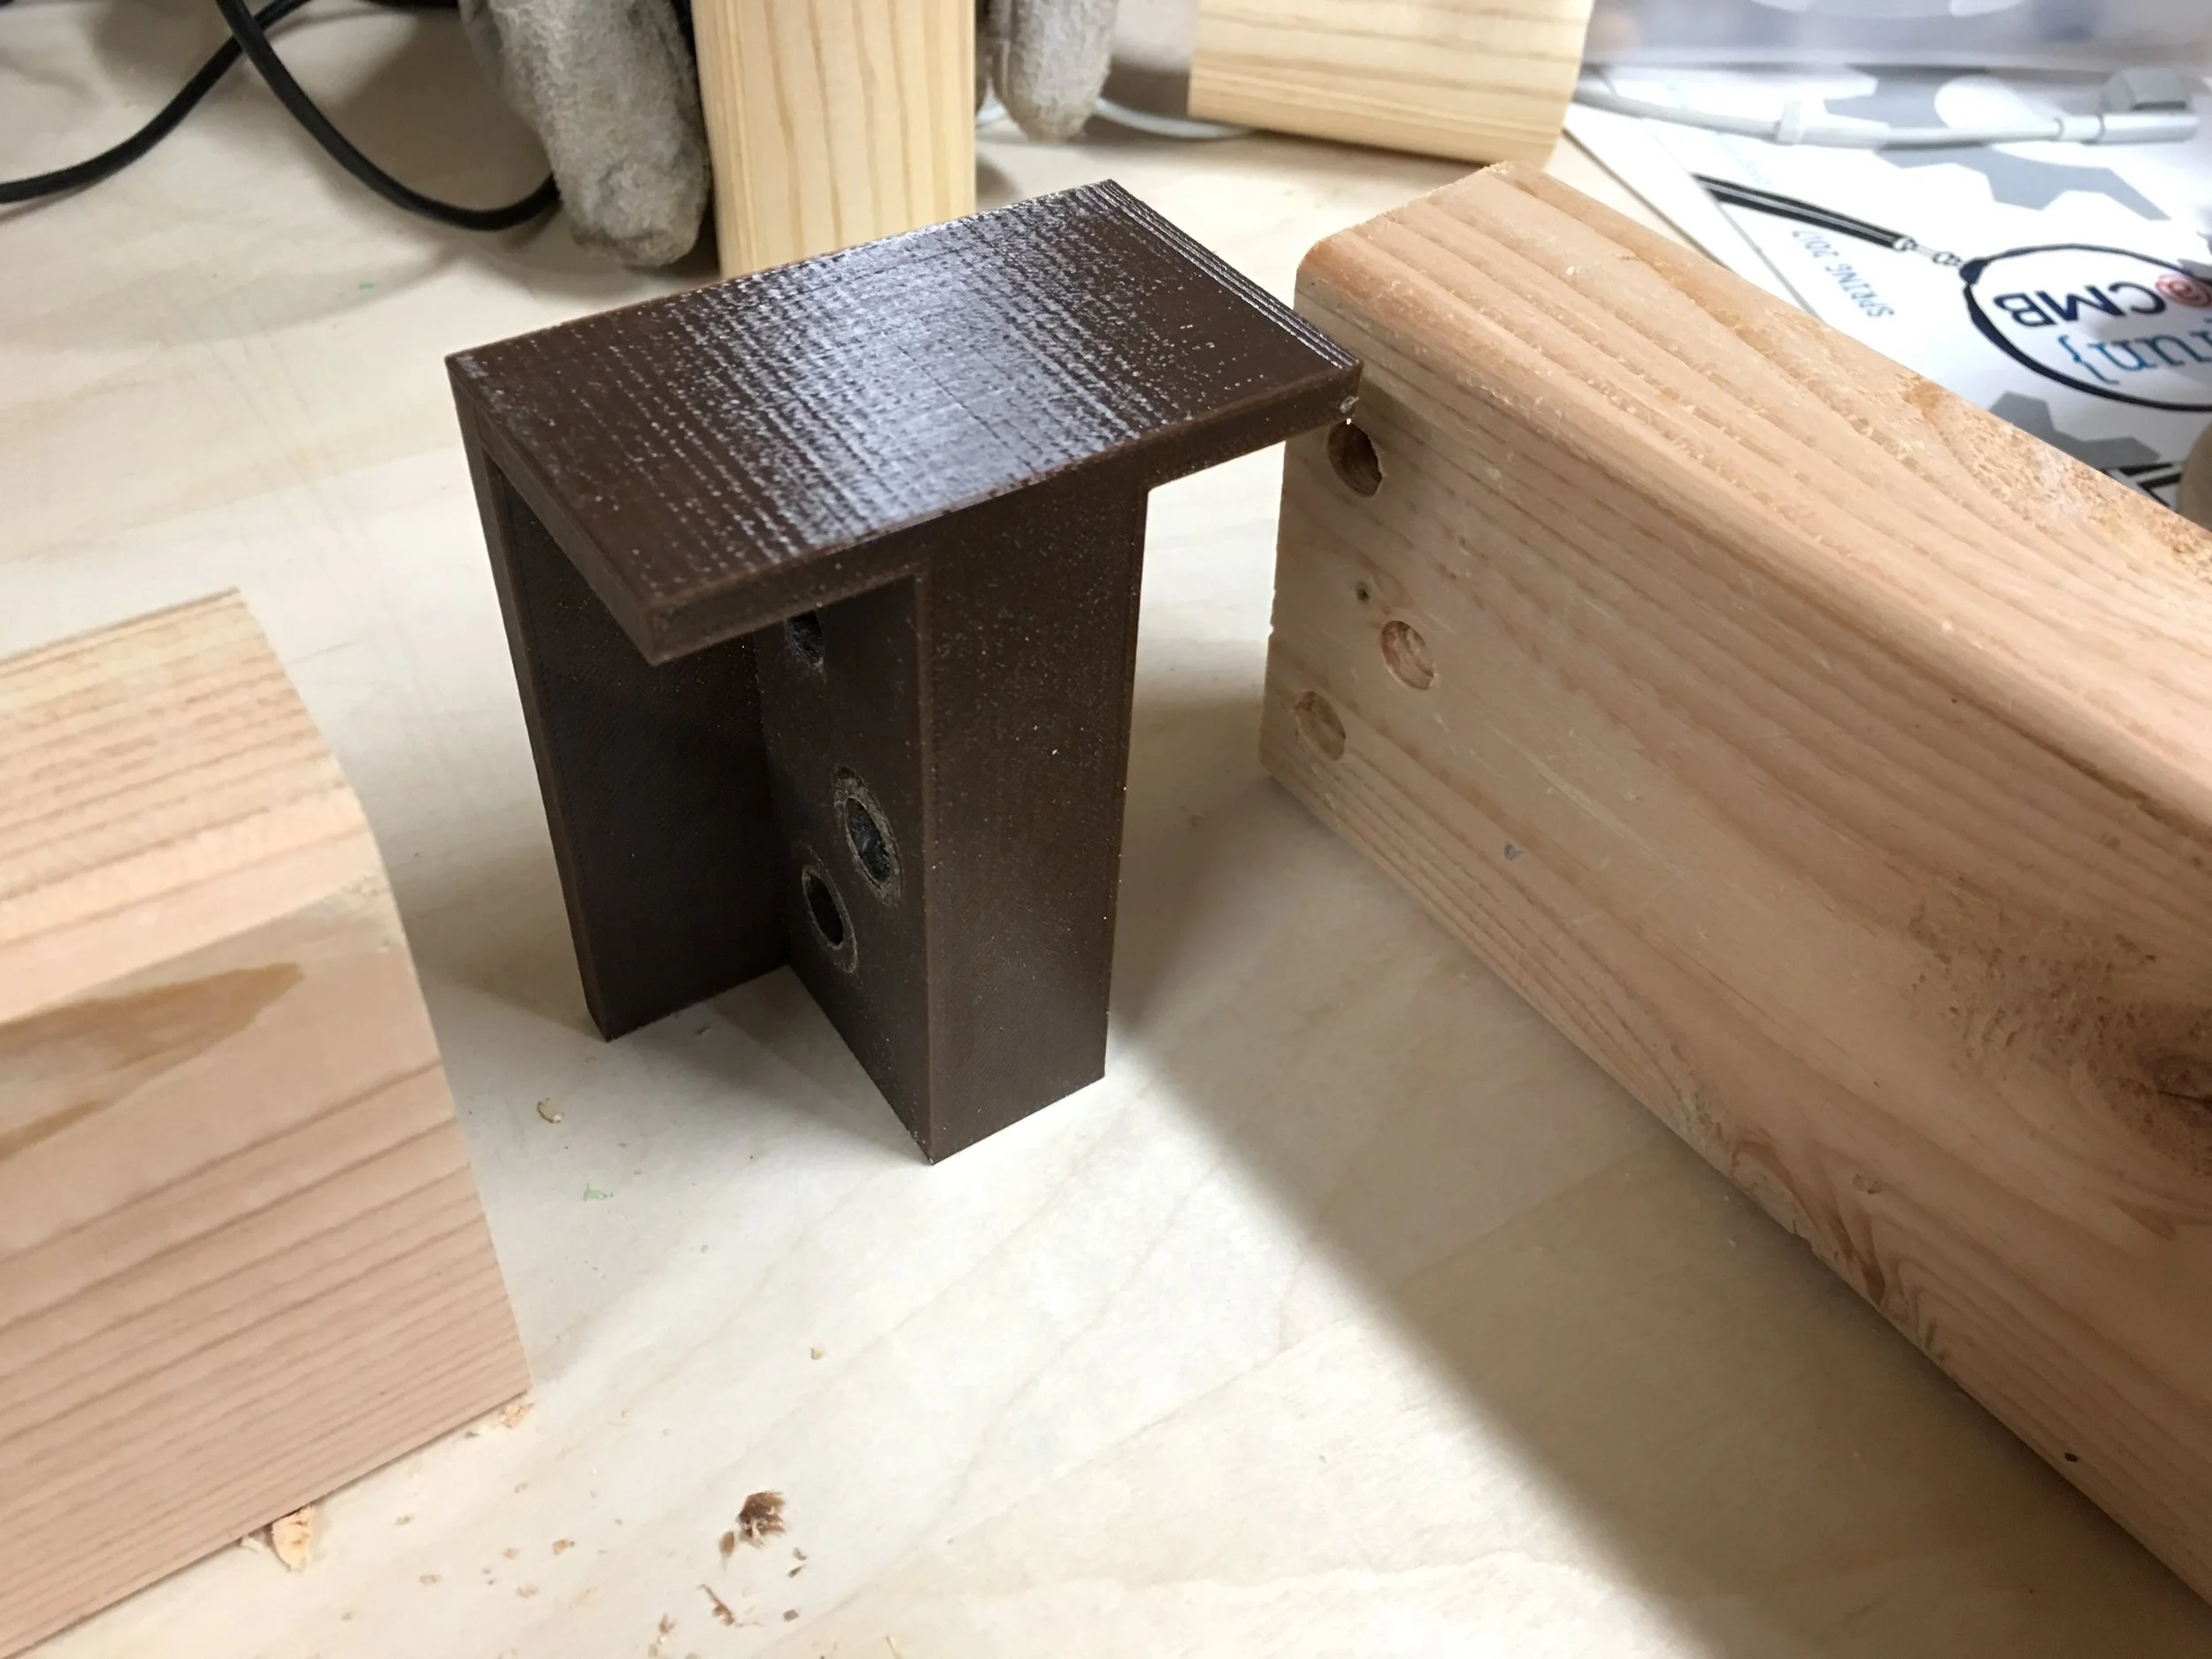
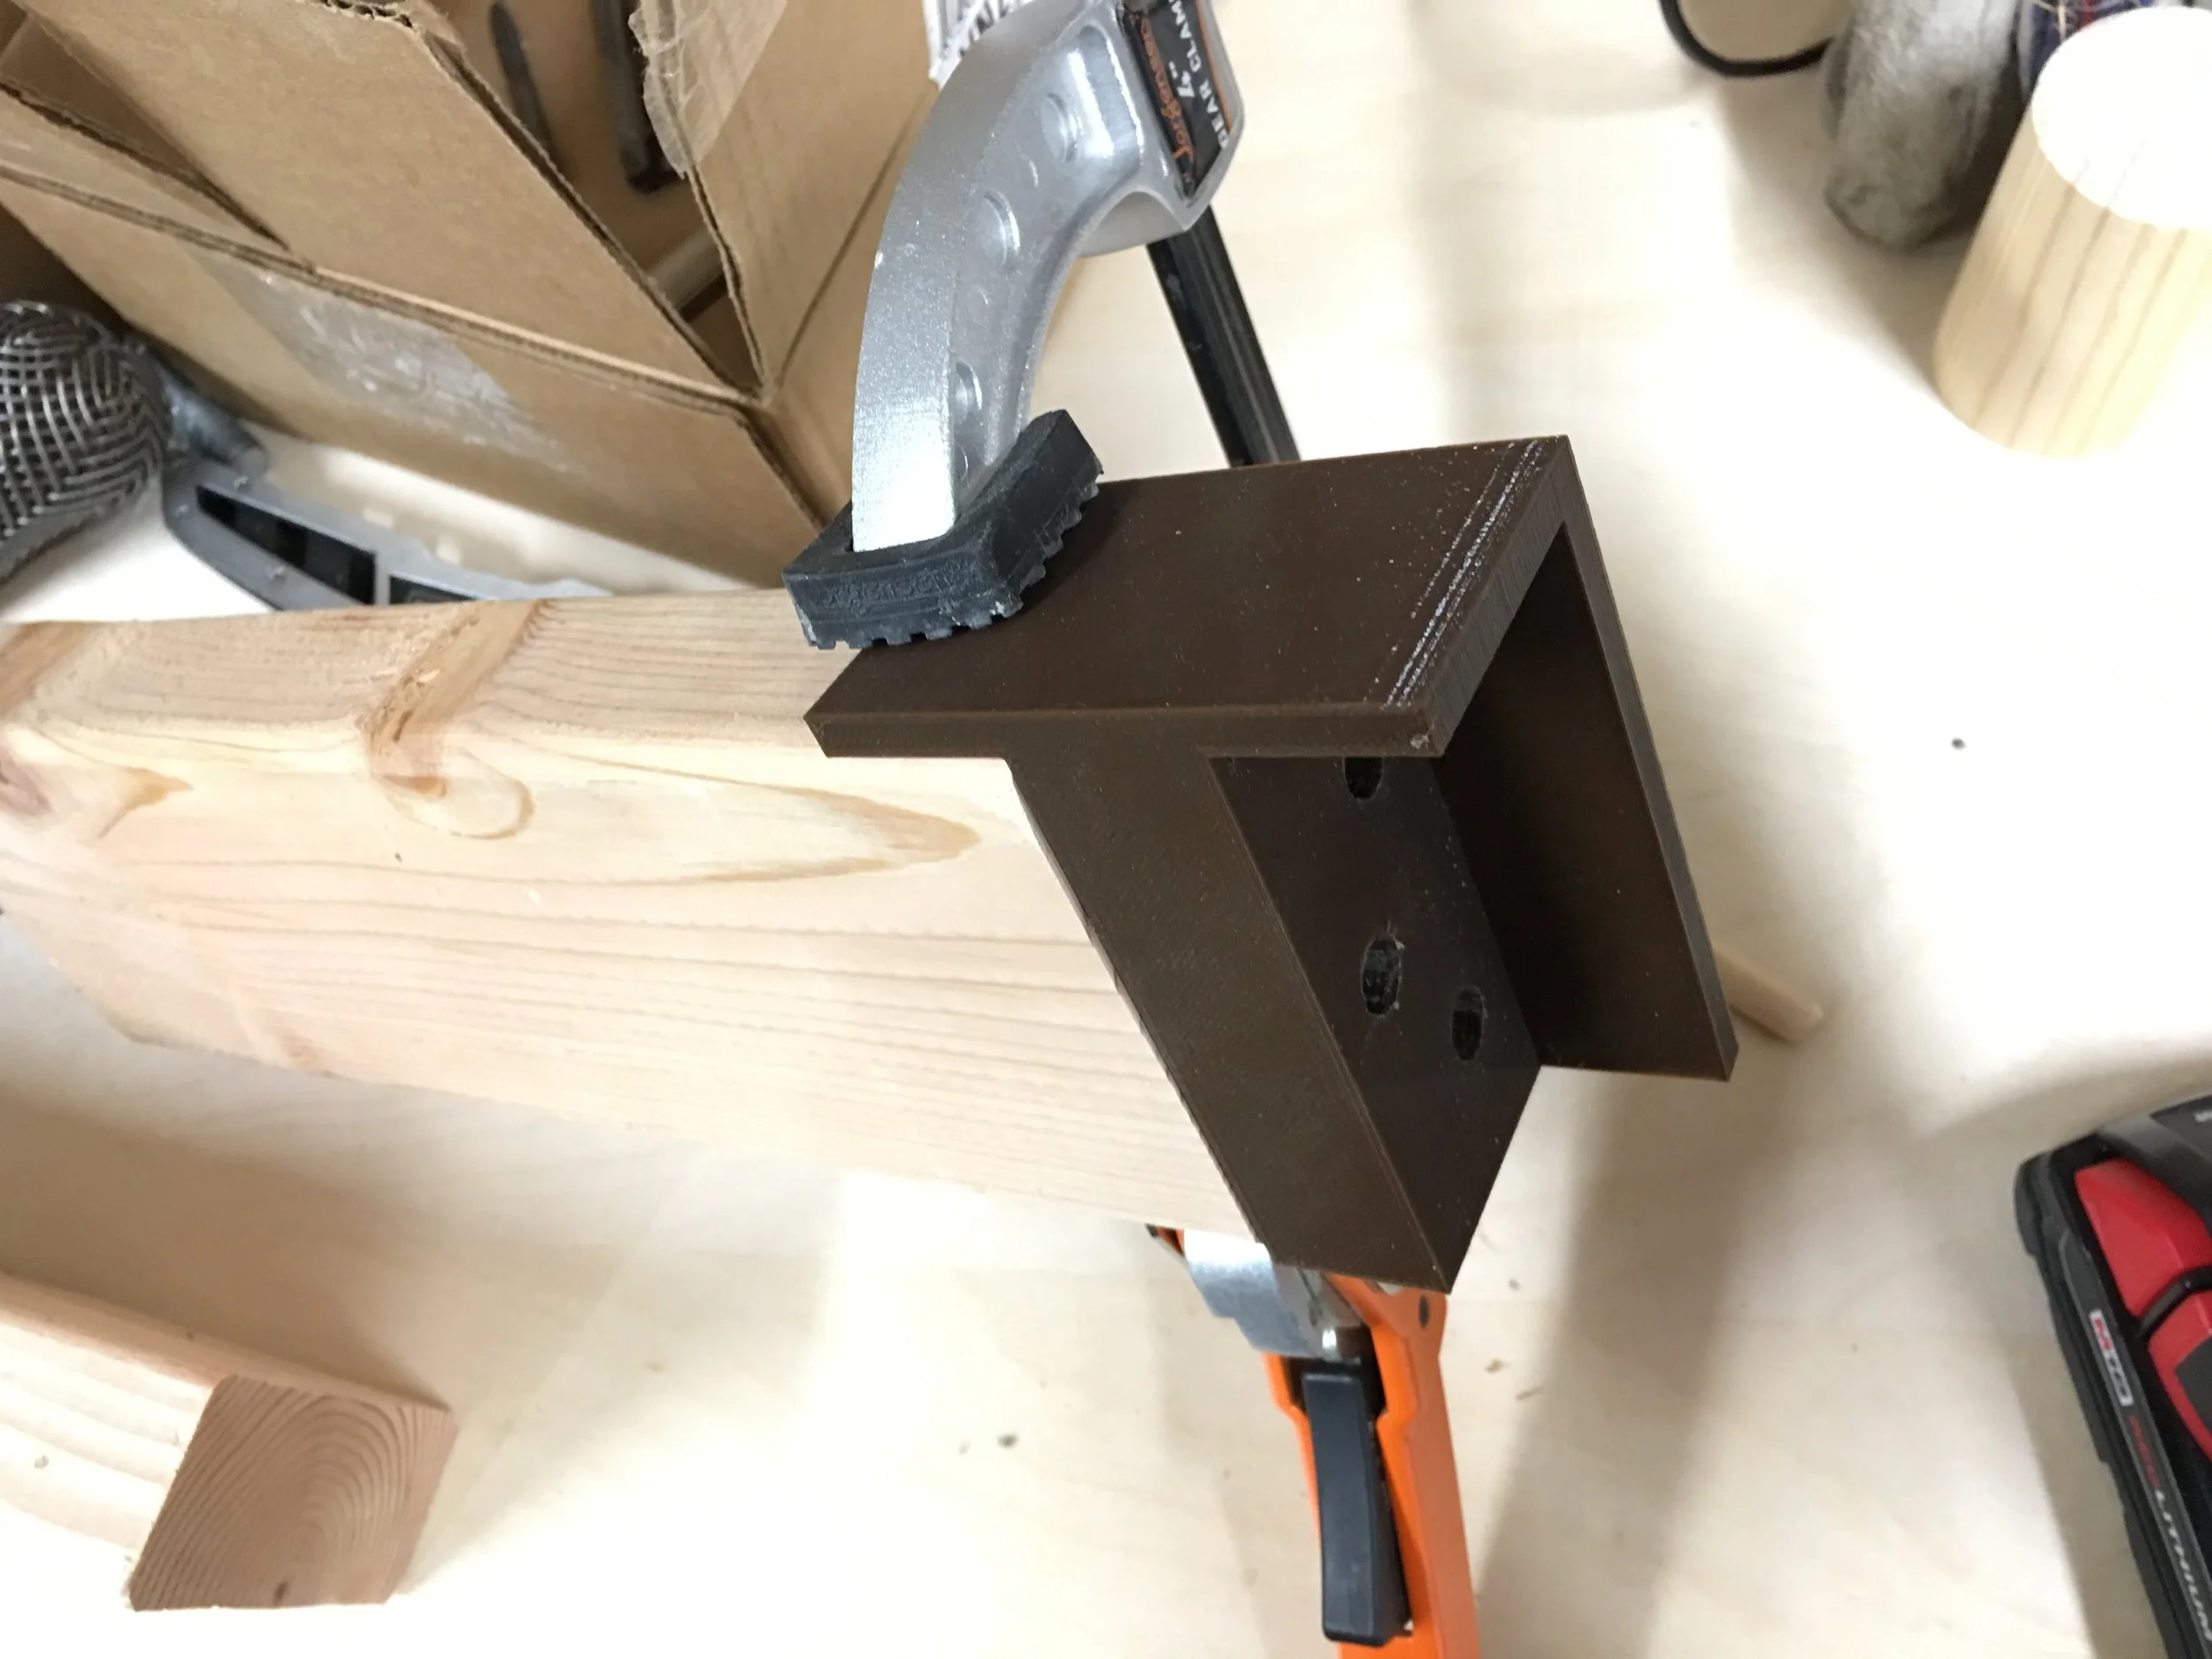
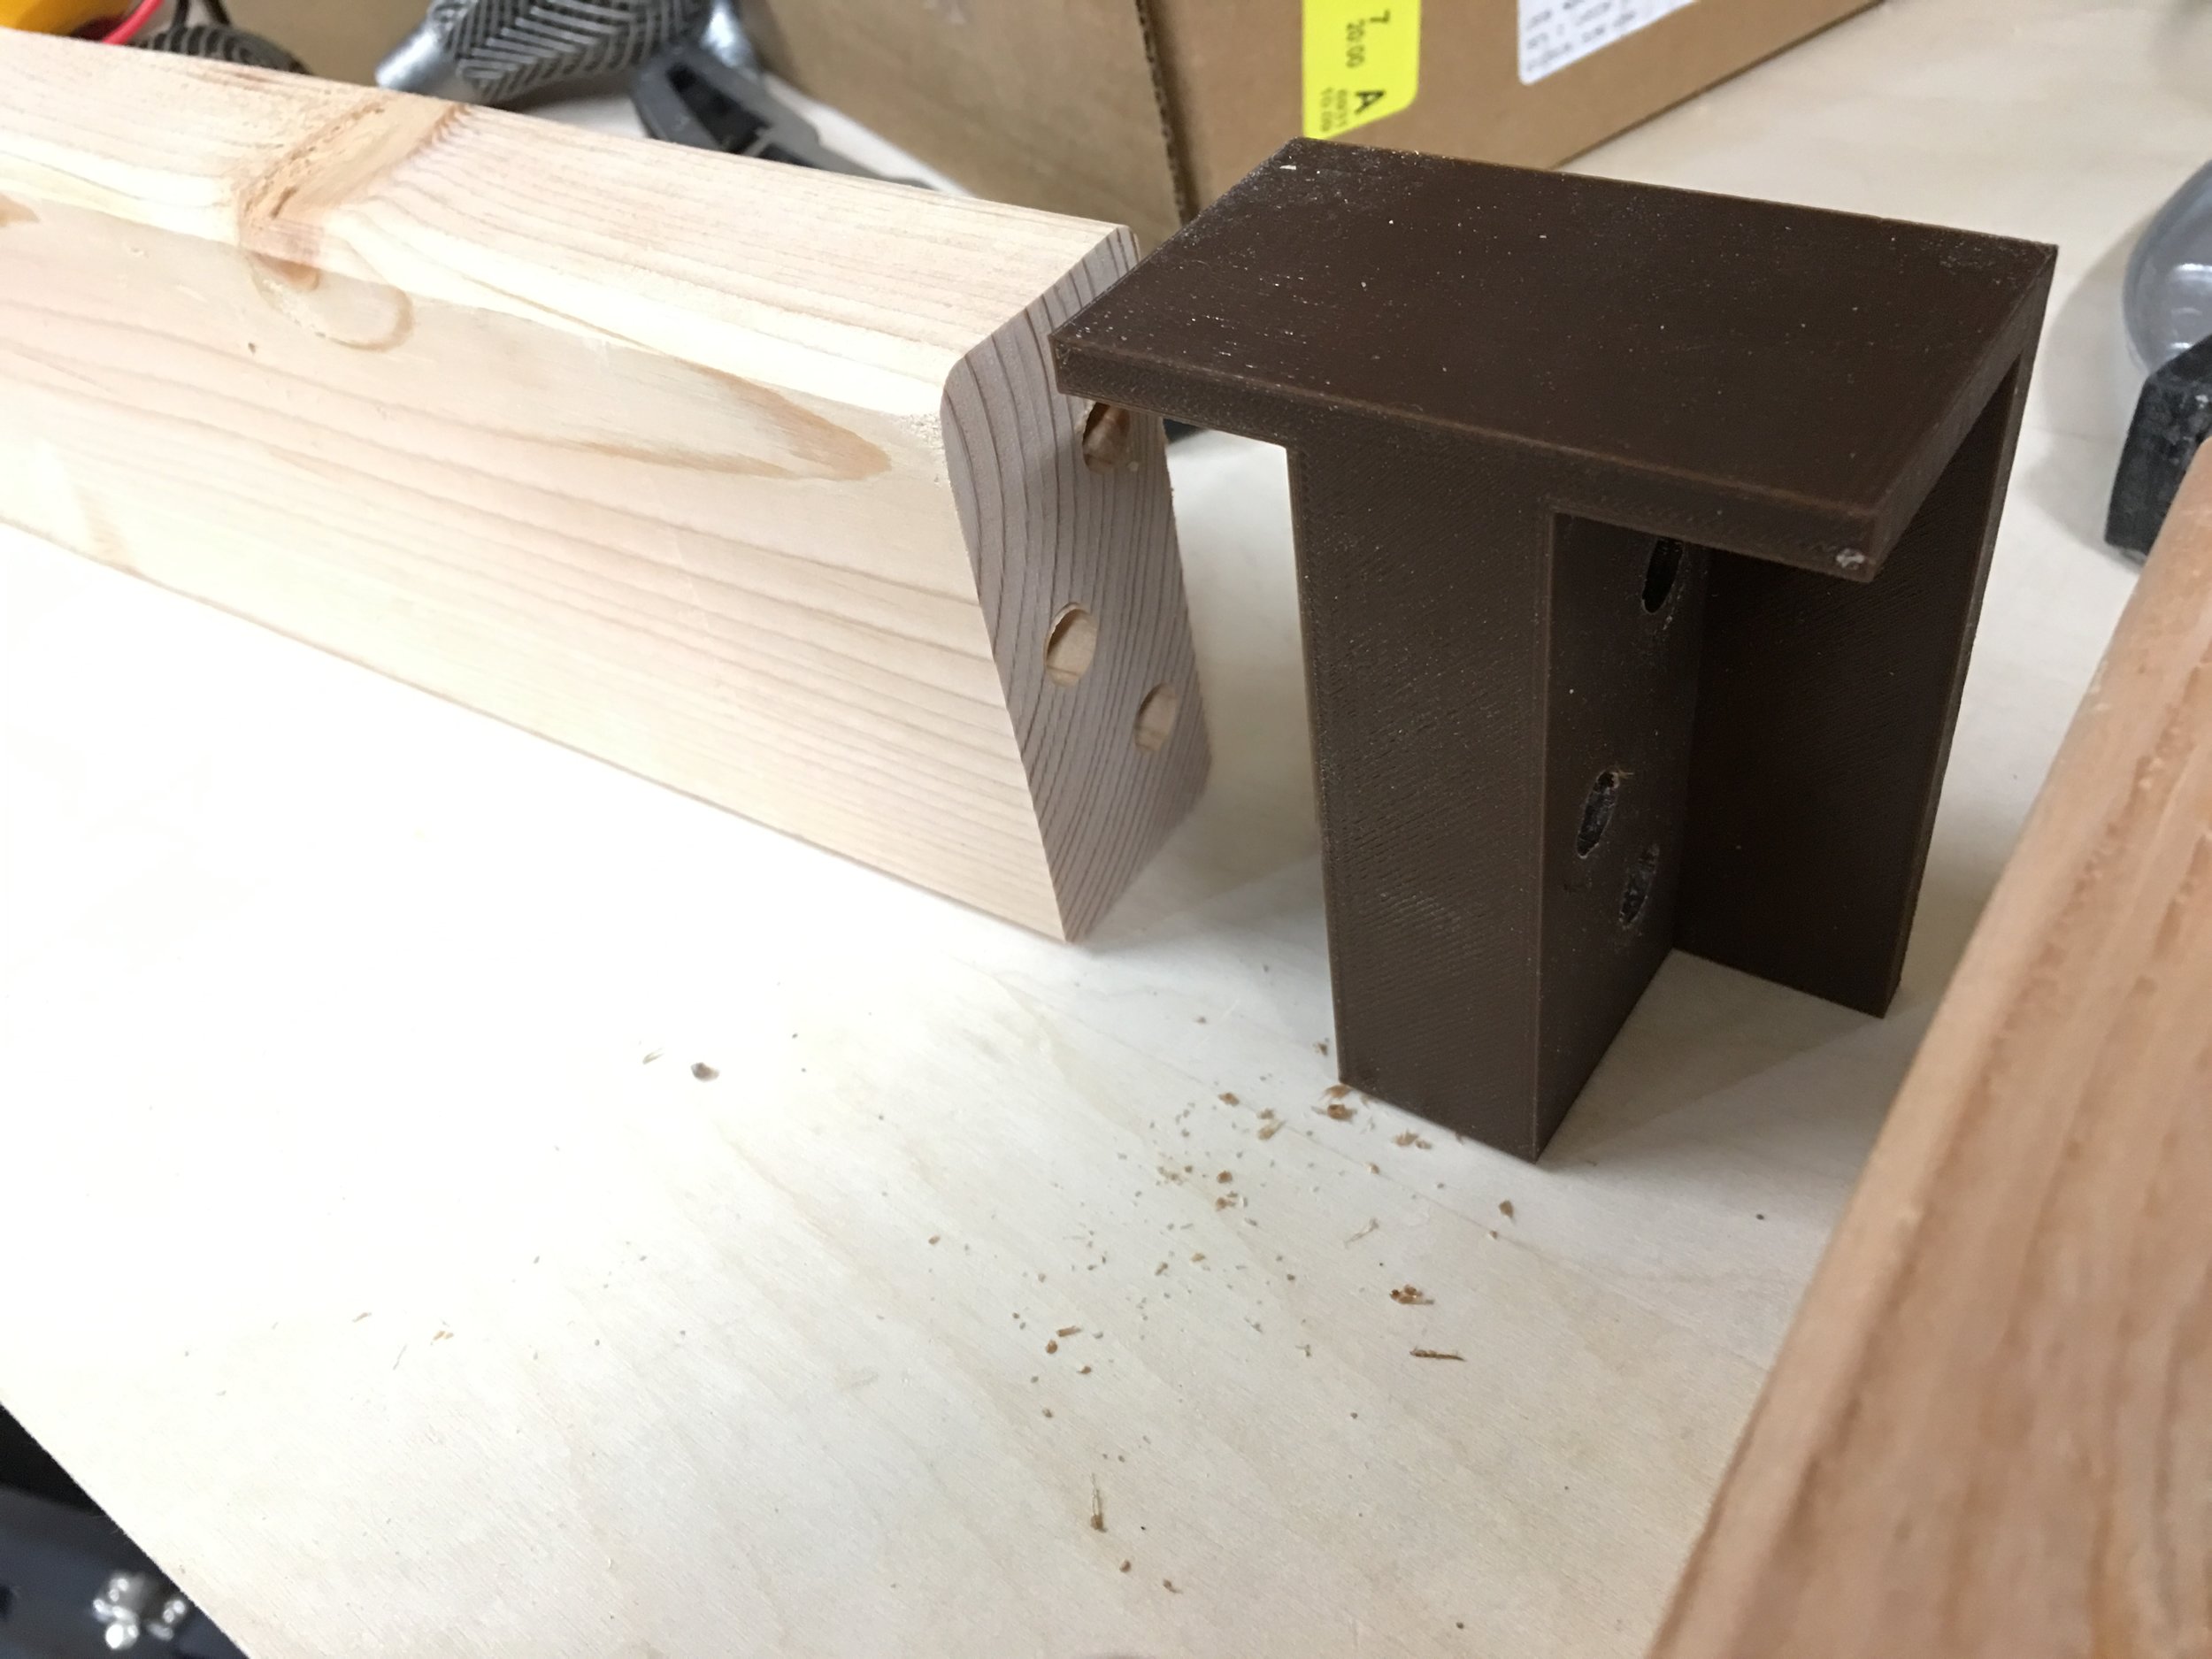
Now you can put wood glue in each hole, insert your dowel pins and clamp the boards together.
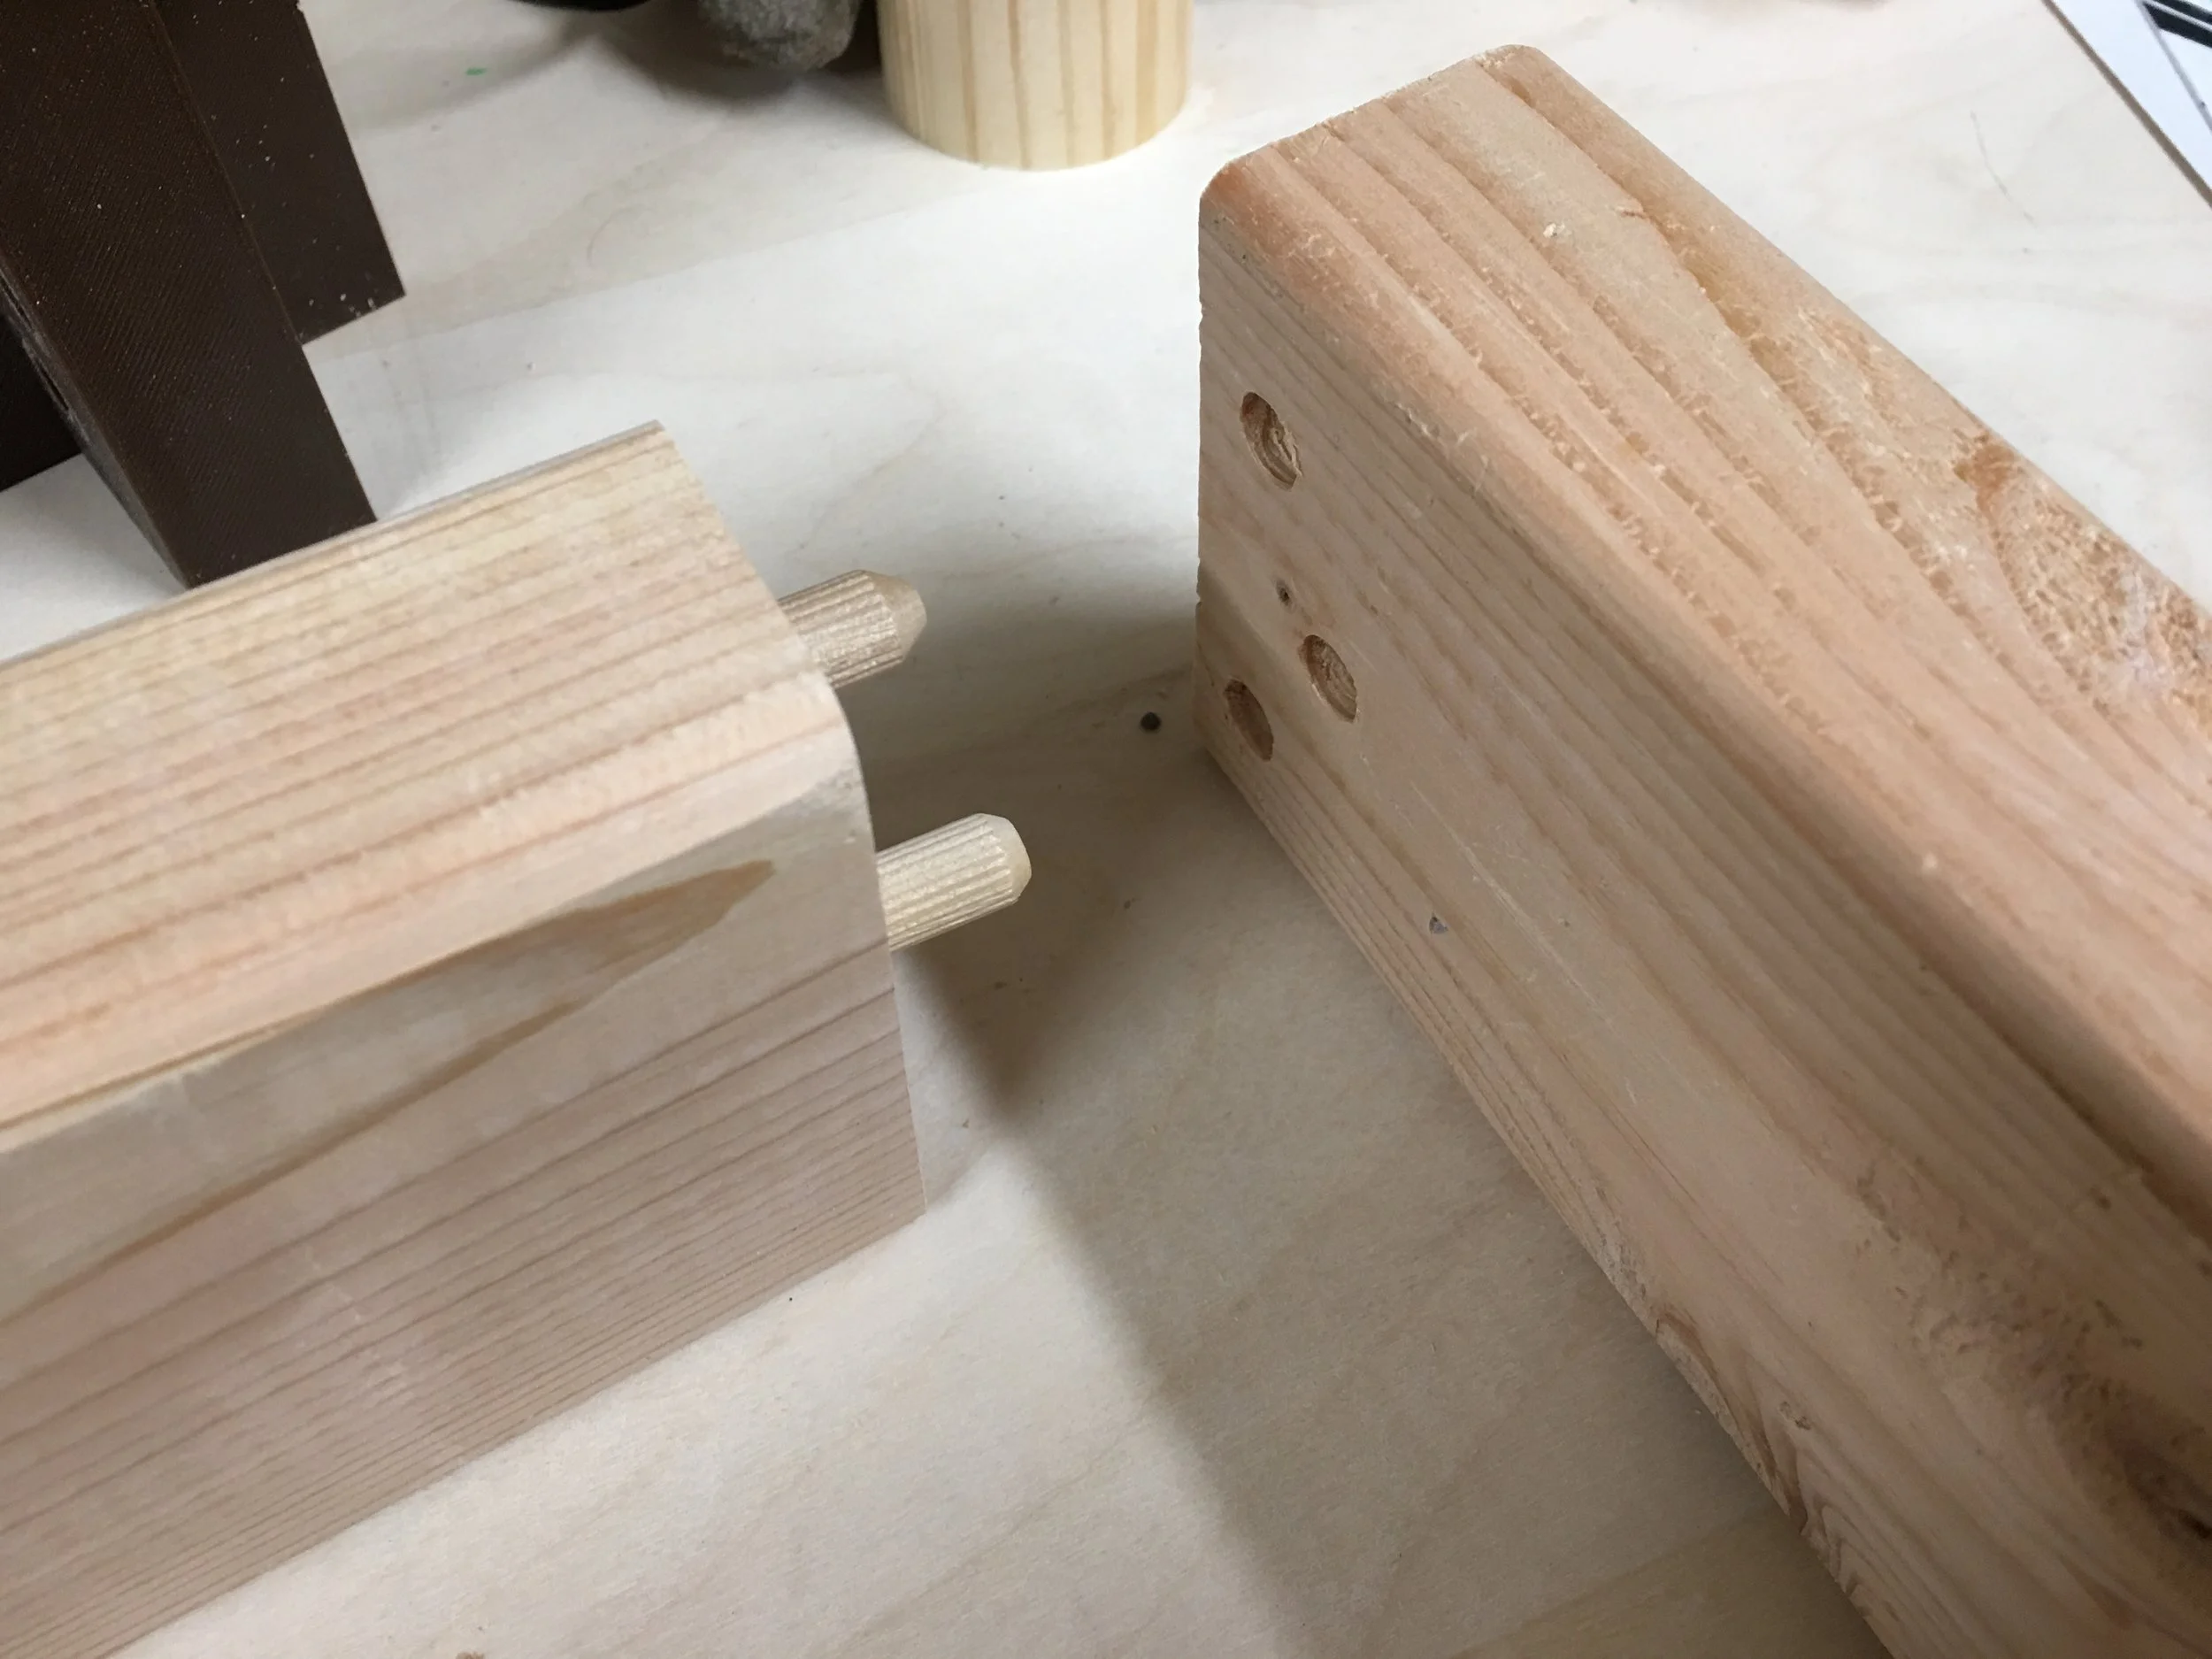
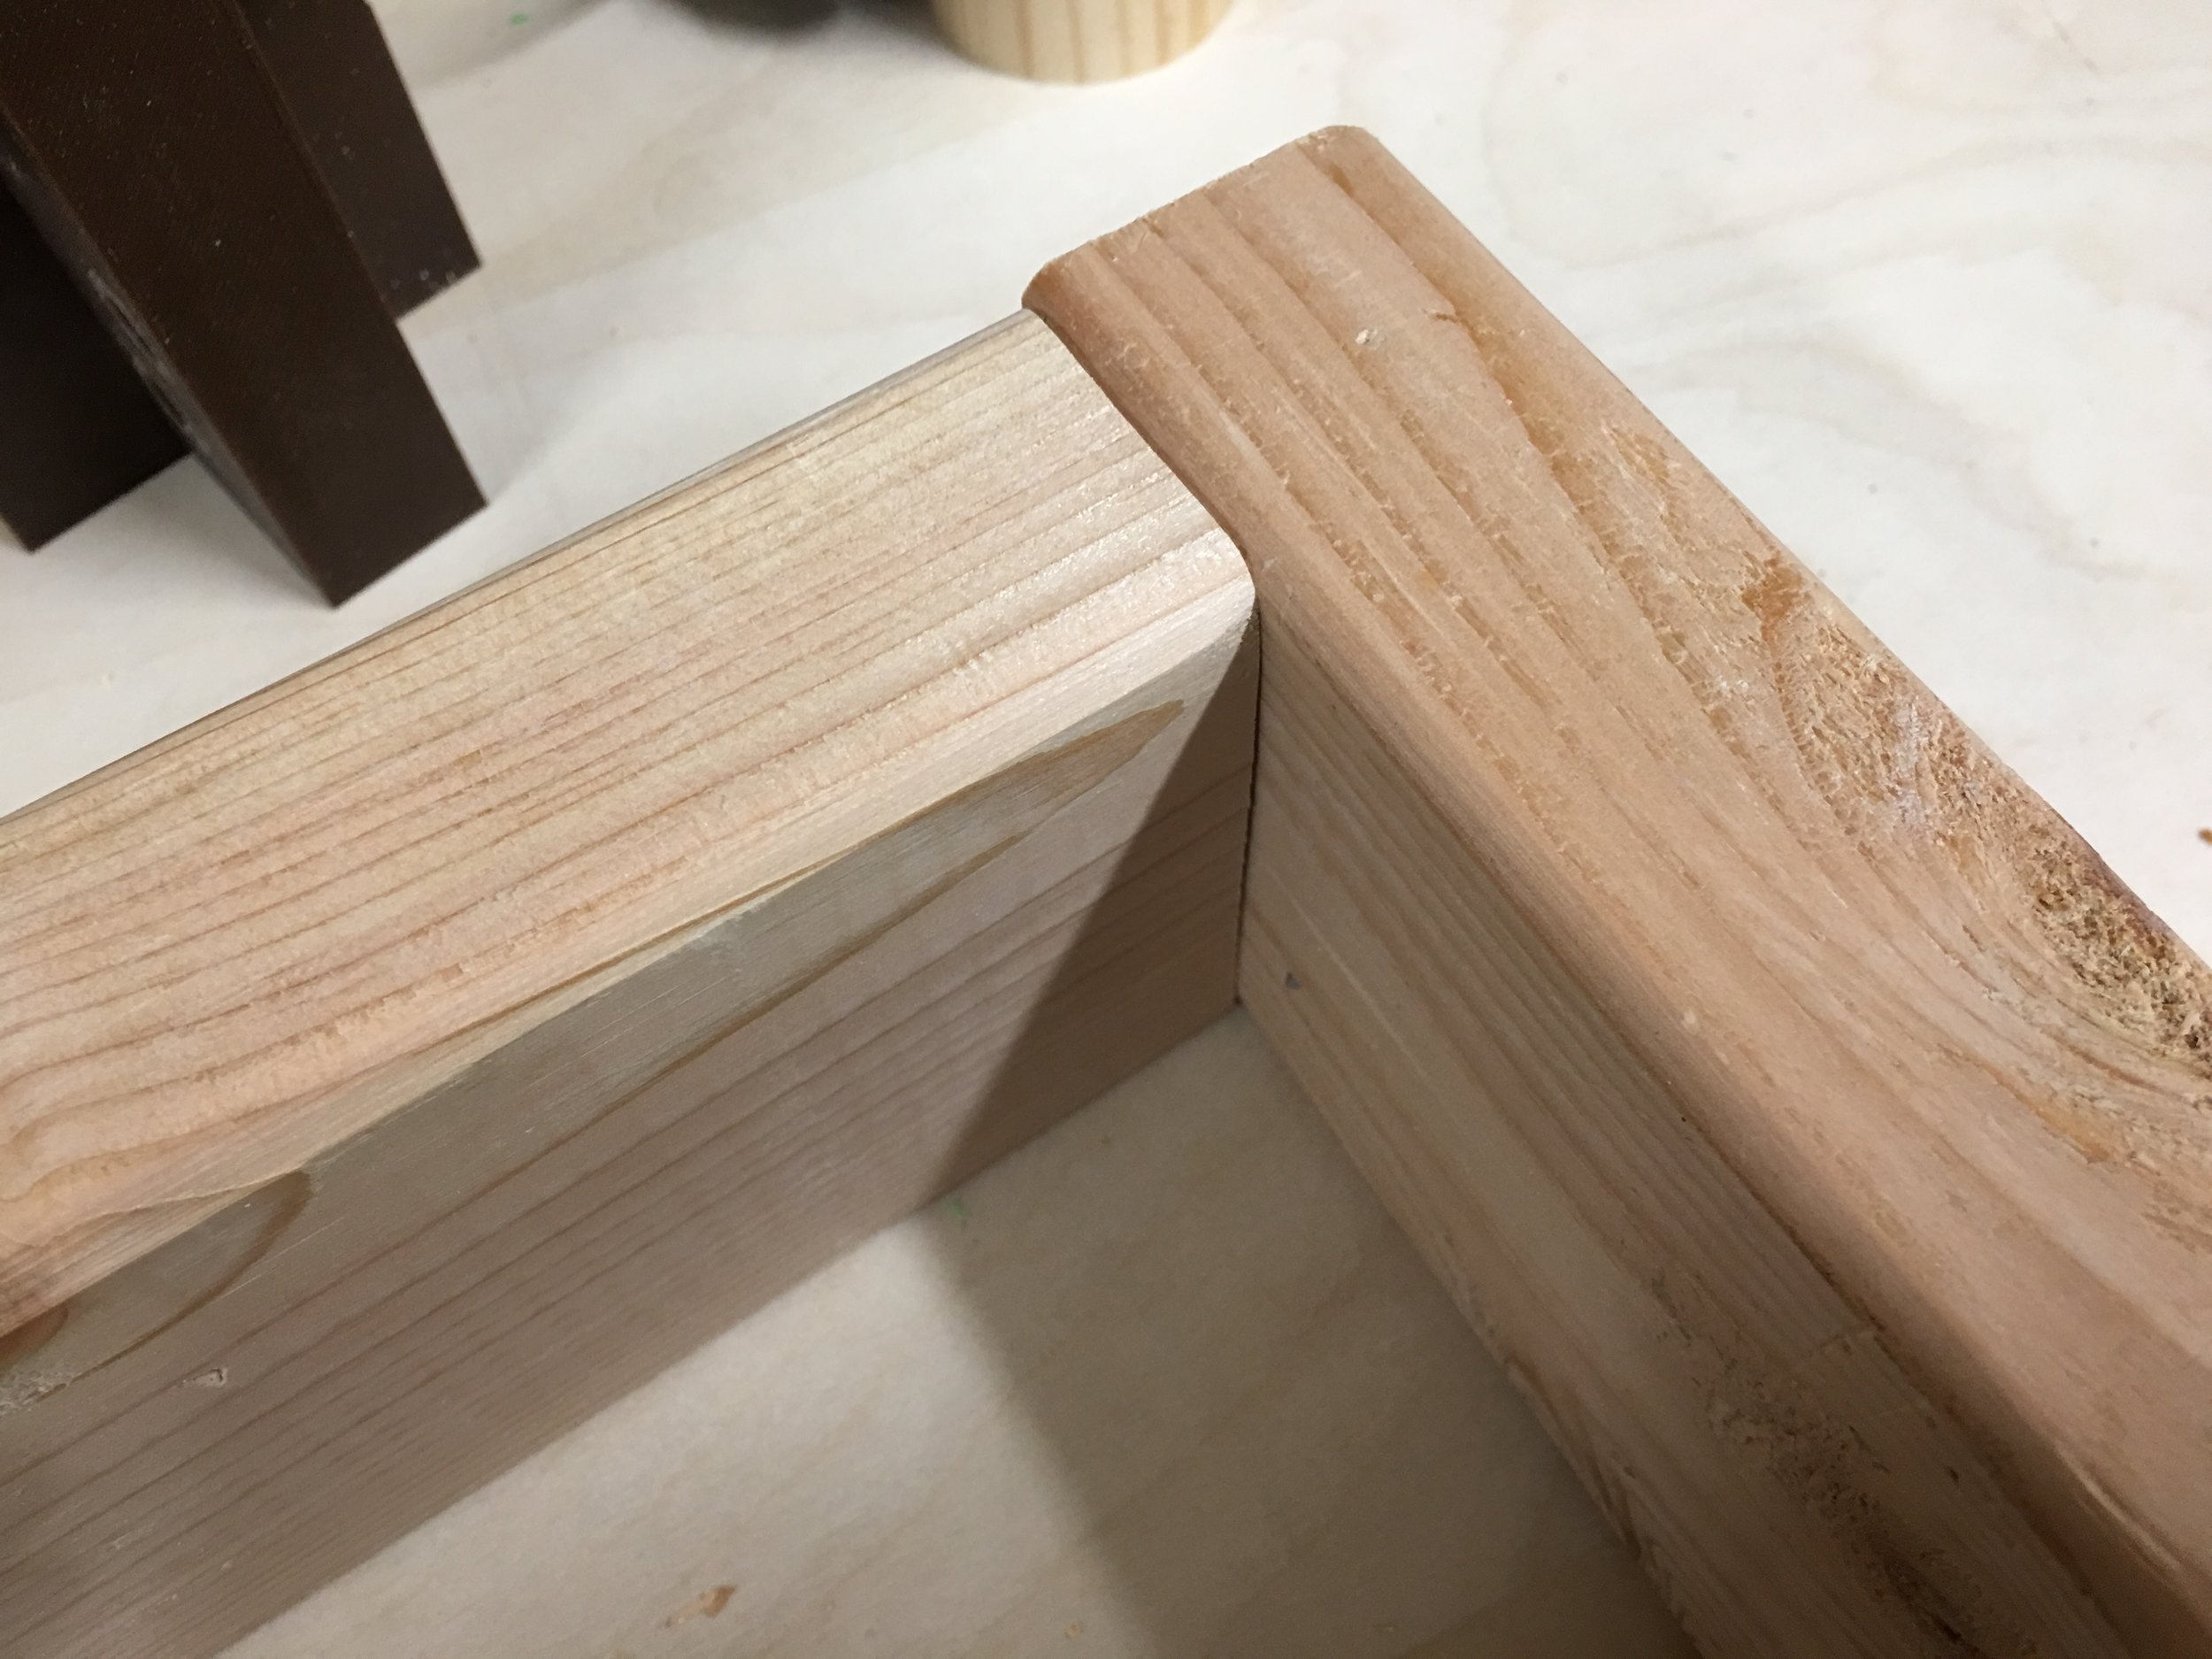
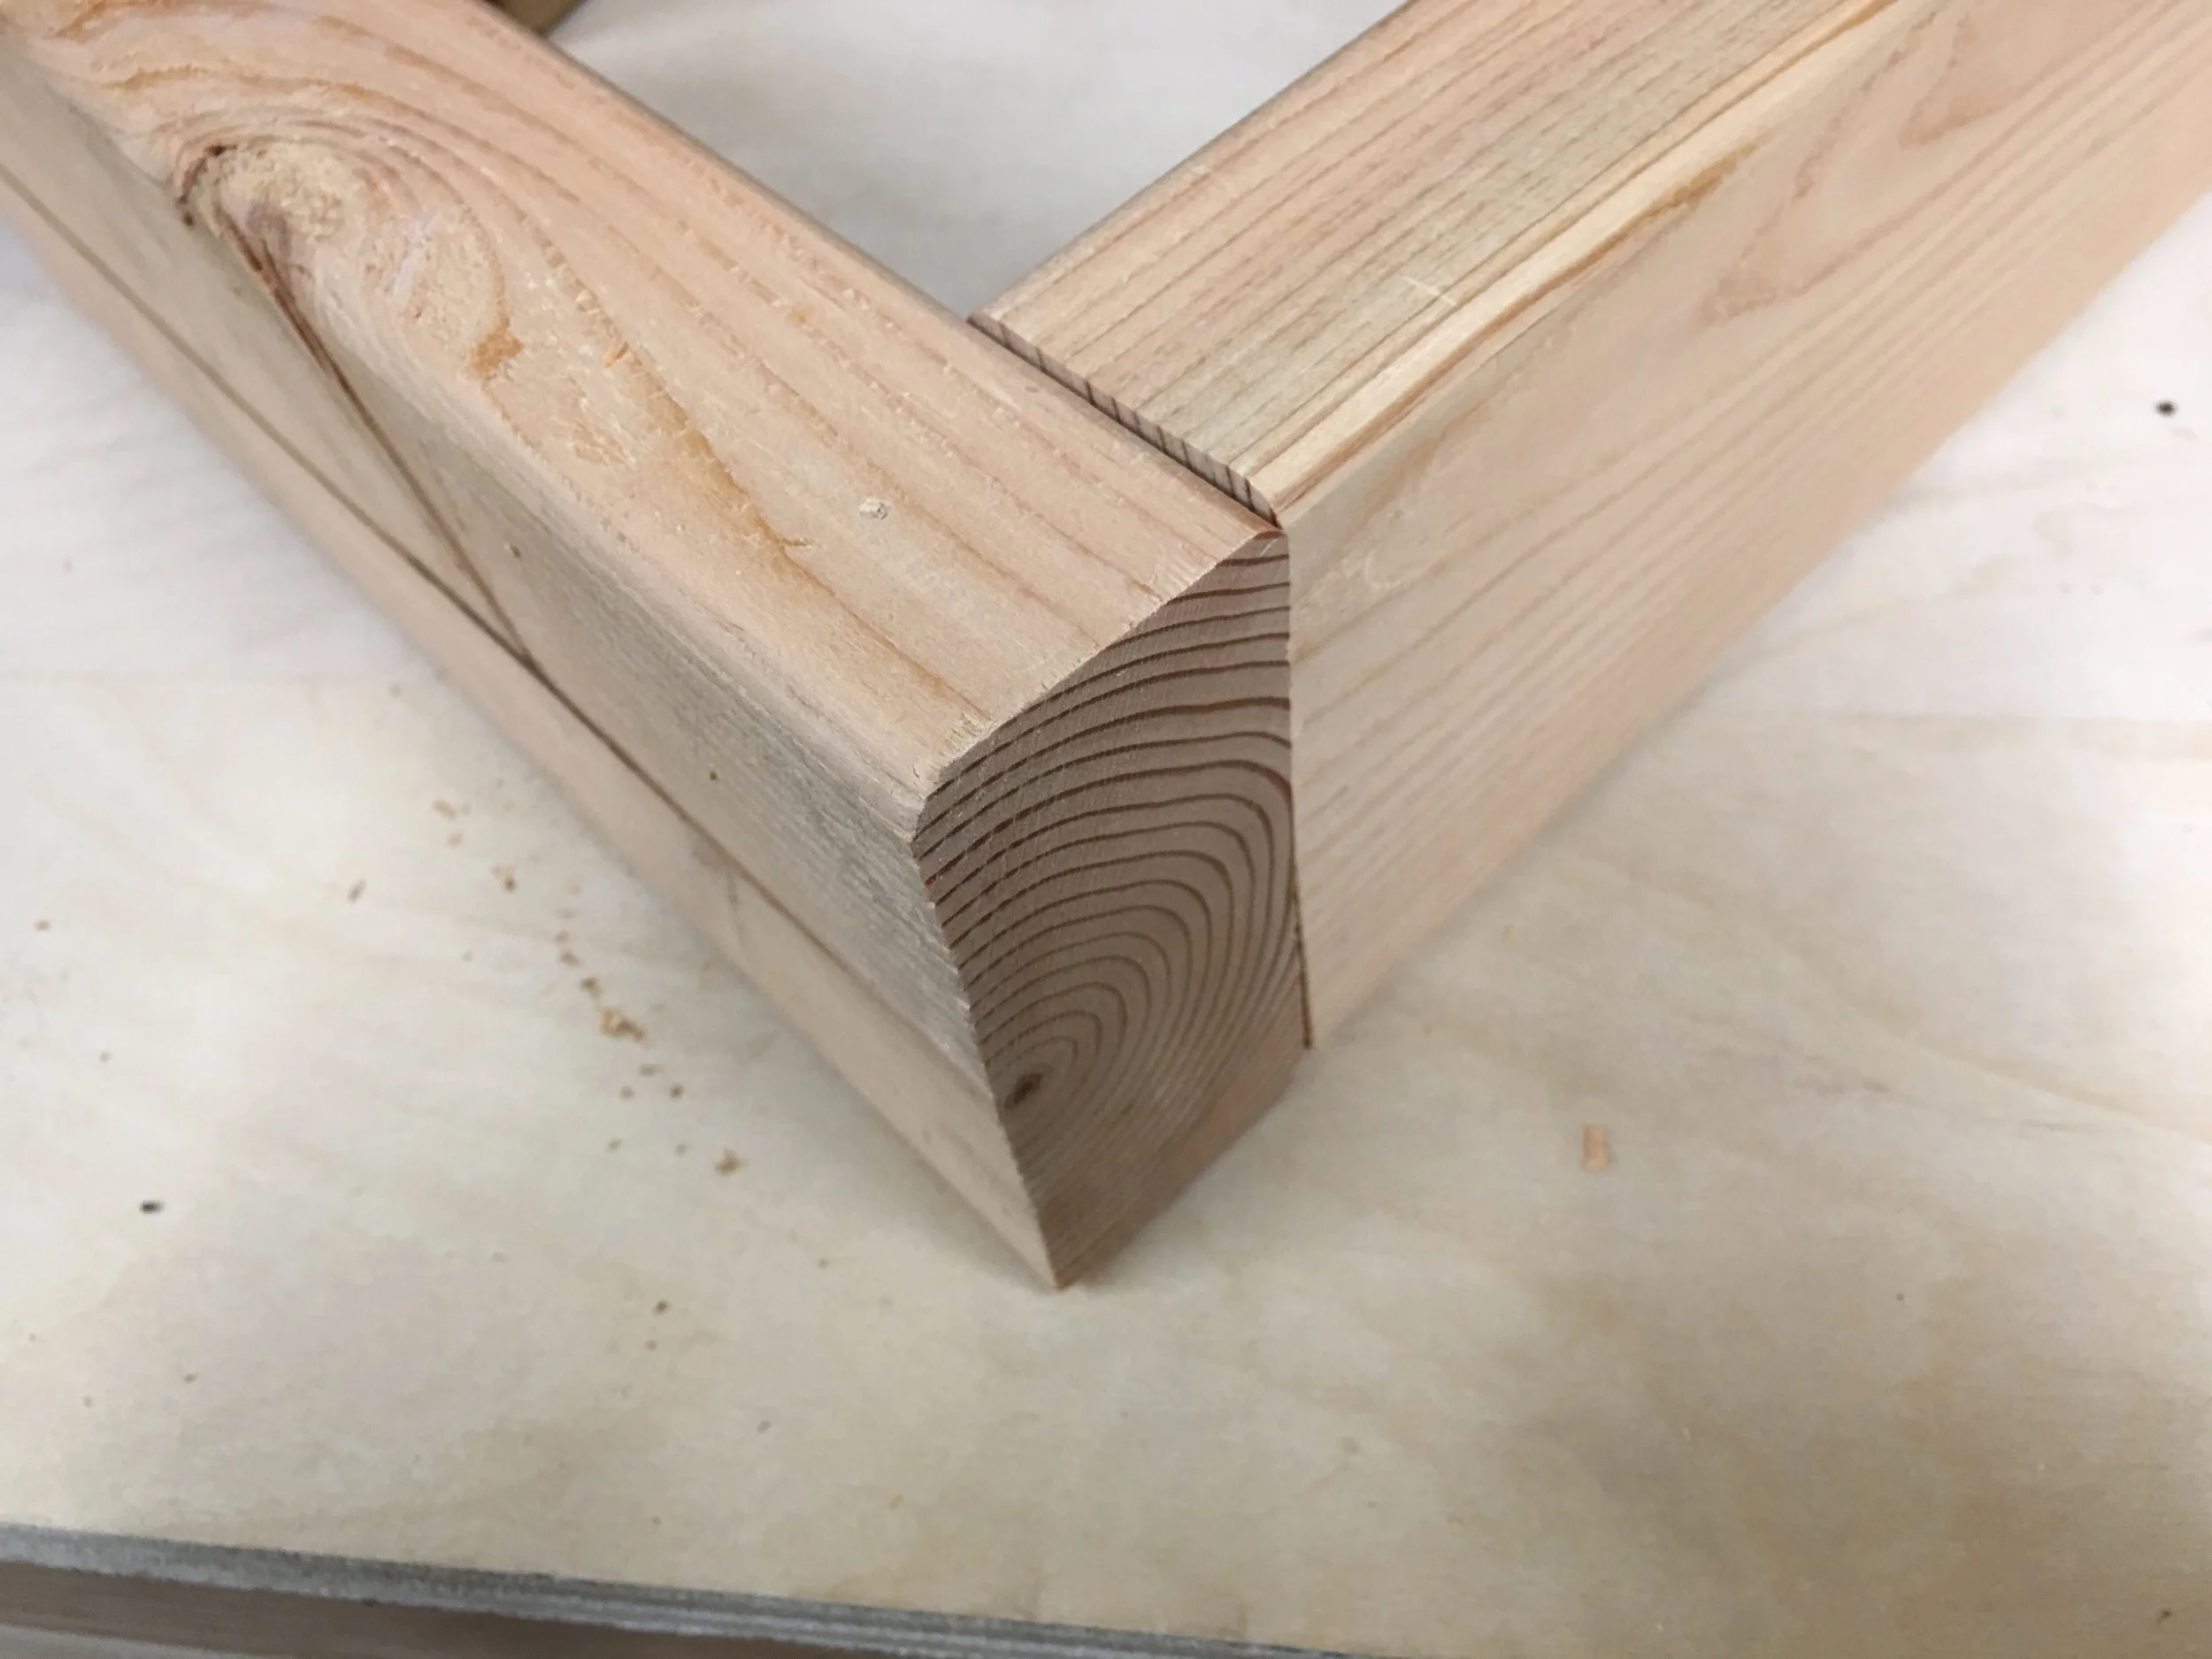
Here are a couple pictures from my table build, where I used two different jigs. One was for the 2x4s and the other for the 4x4s. The reason I needed two jigs, was I wanted to the 2x4s to be inset 3/8" in from the face of the 4x4. This allowed the rounded edges of the 4x4s to not cause any issues. For the full build, along with its own interactive table widget, head over to this post.
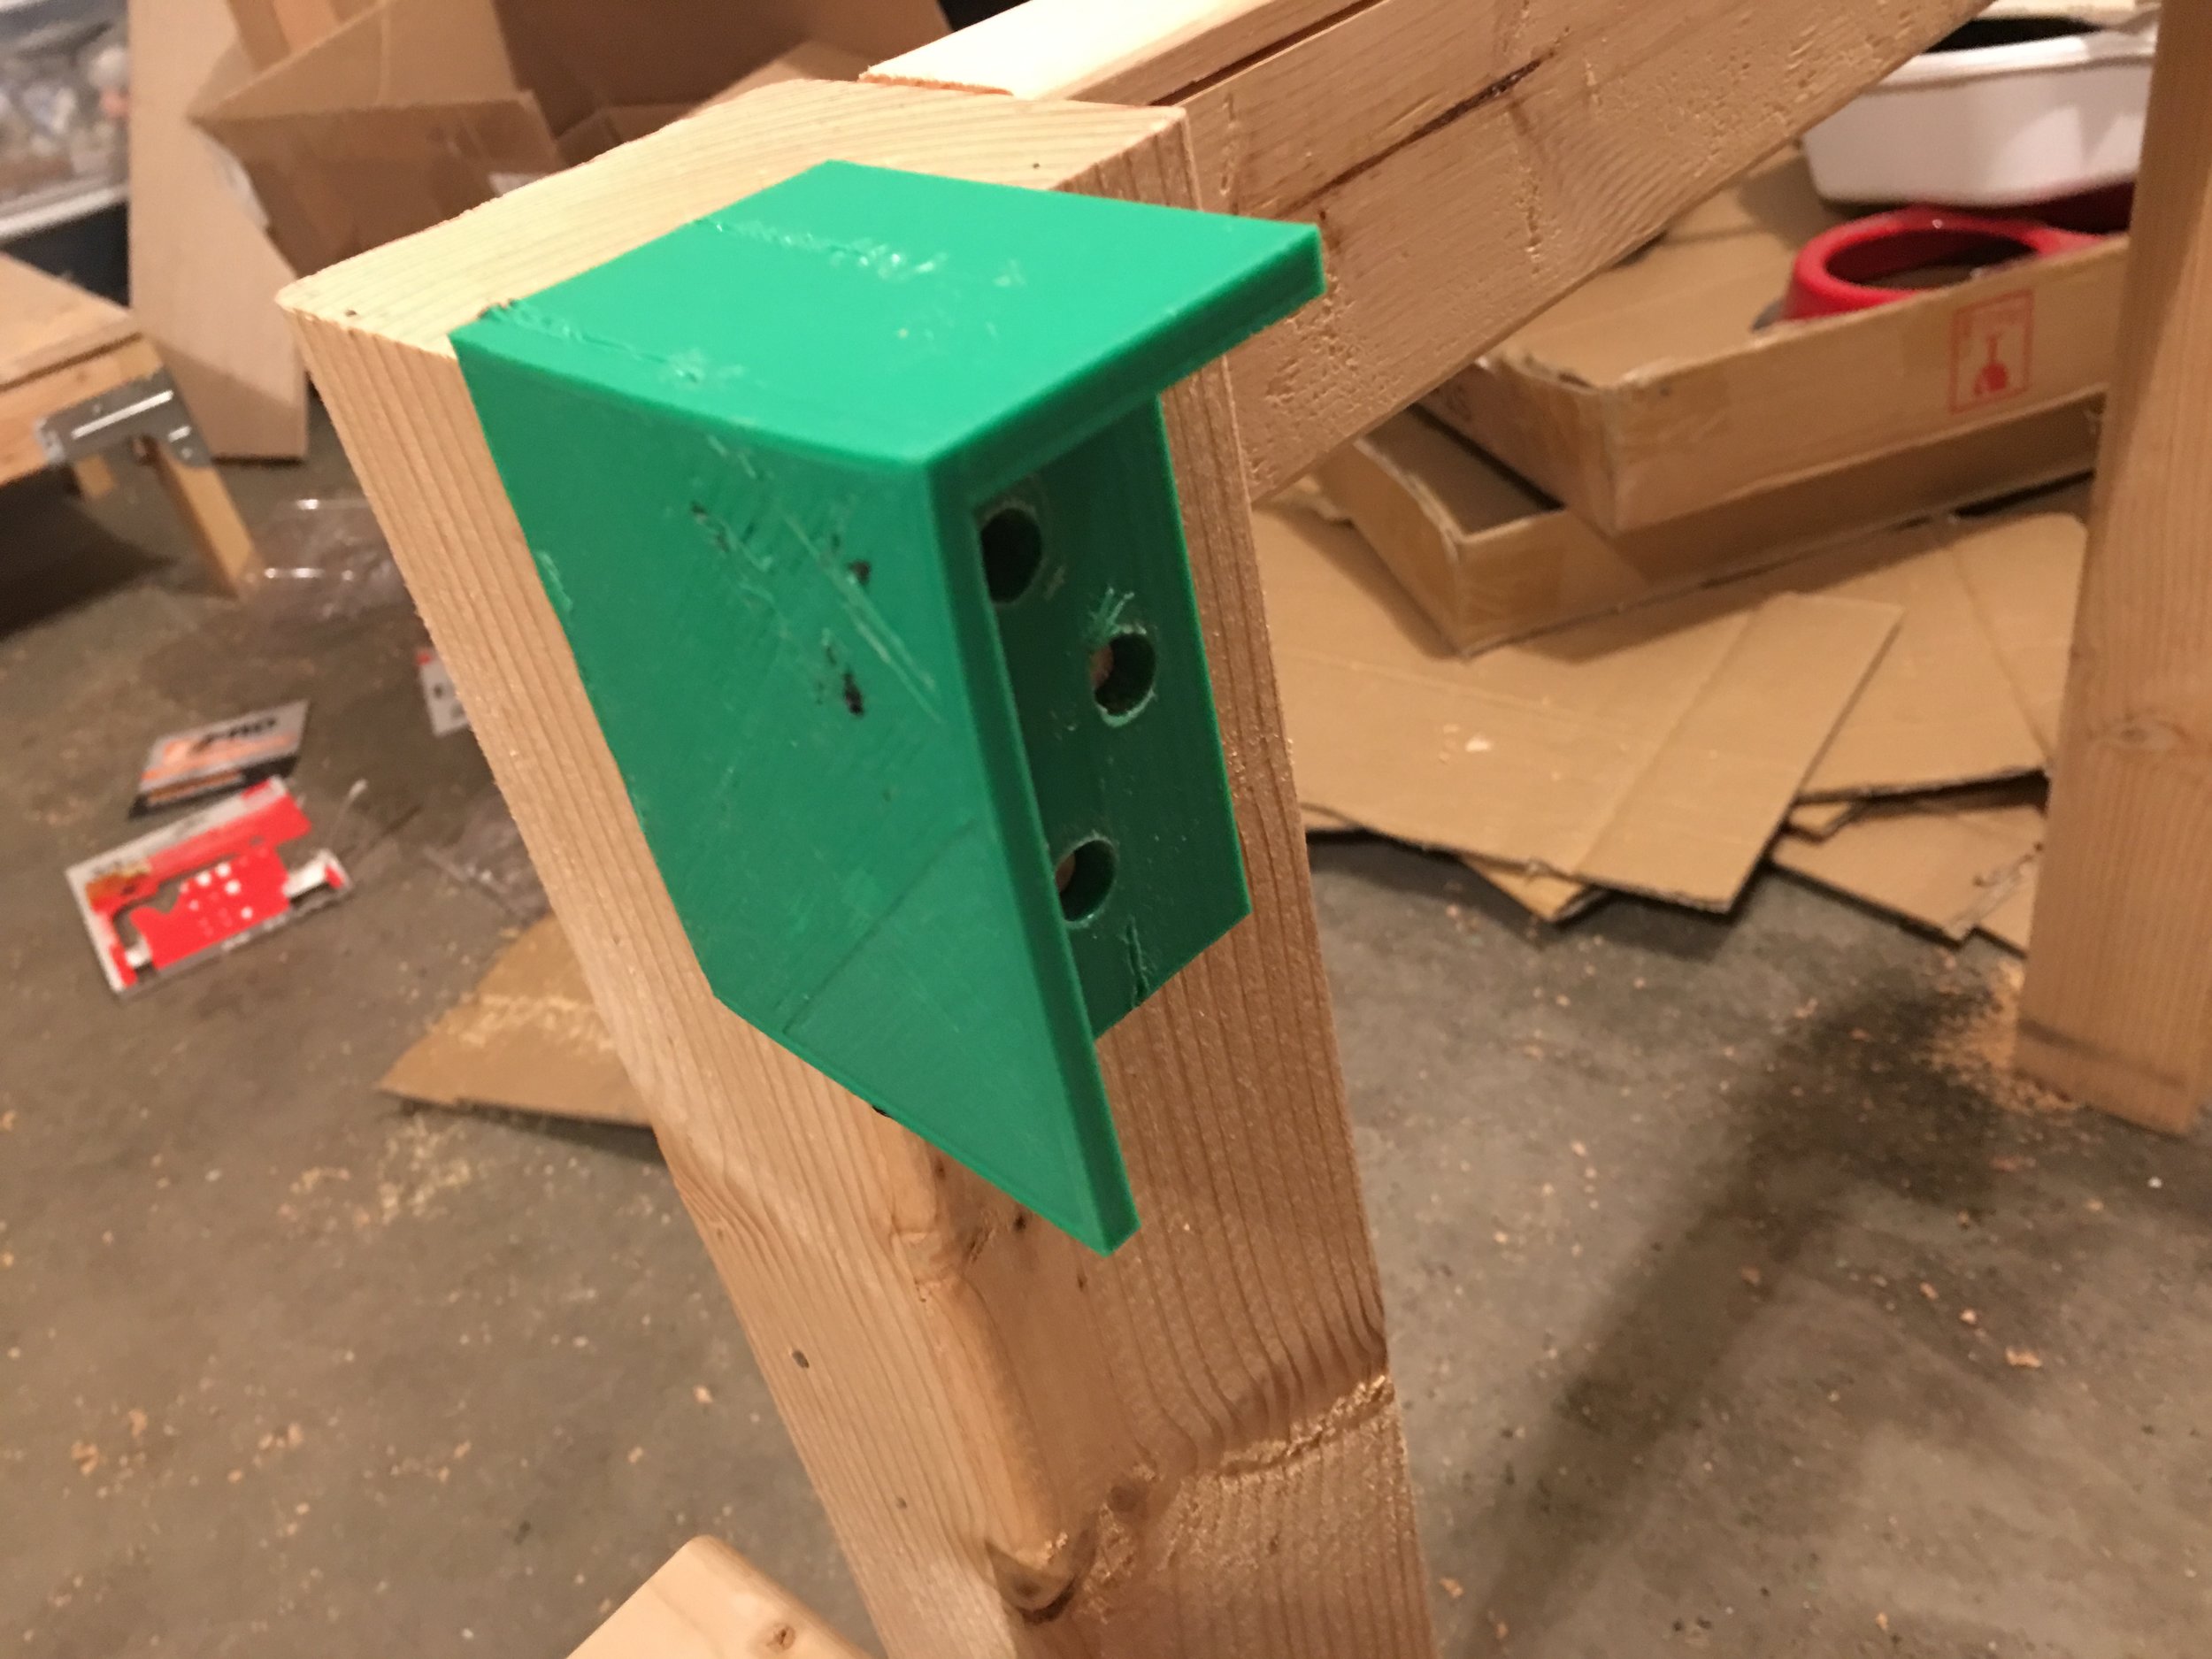
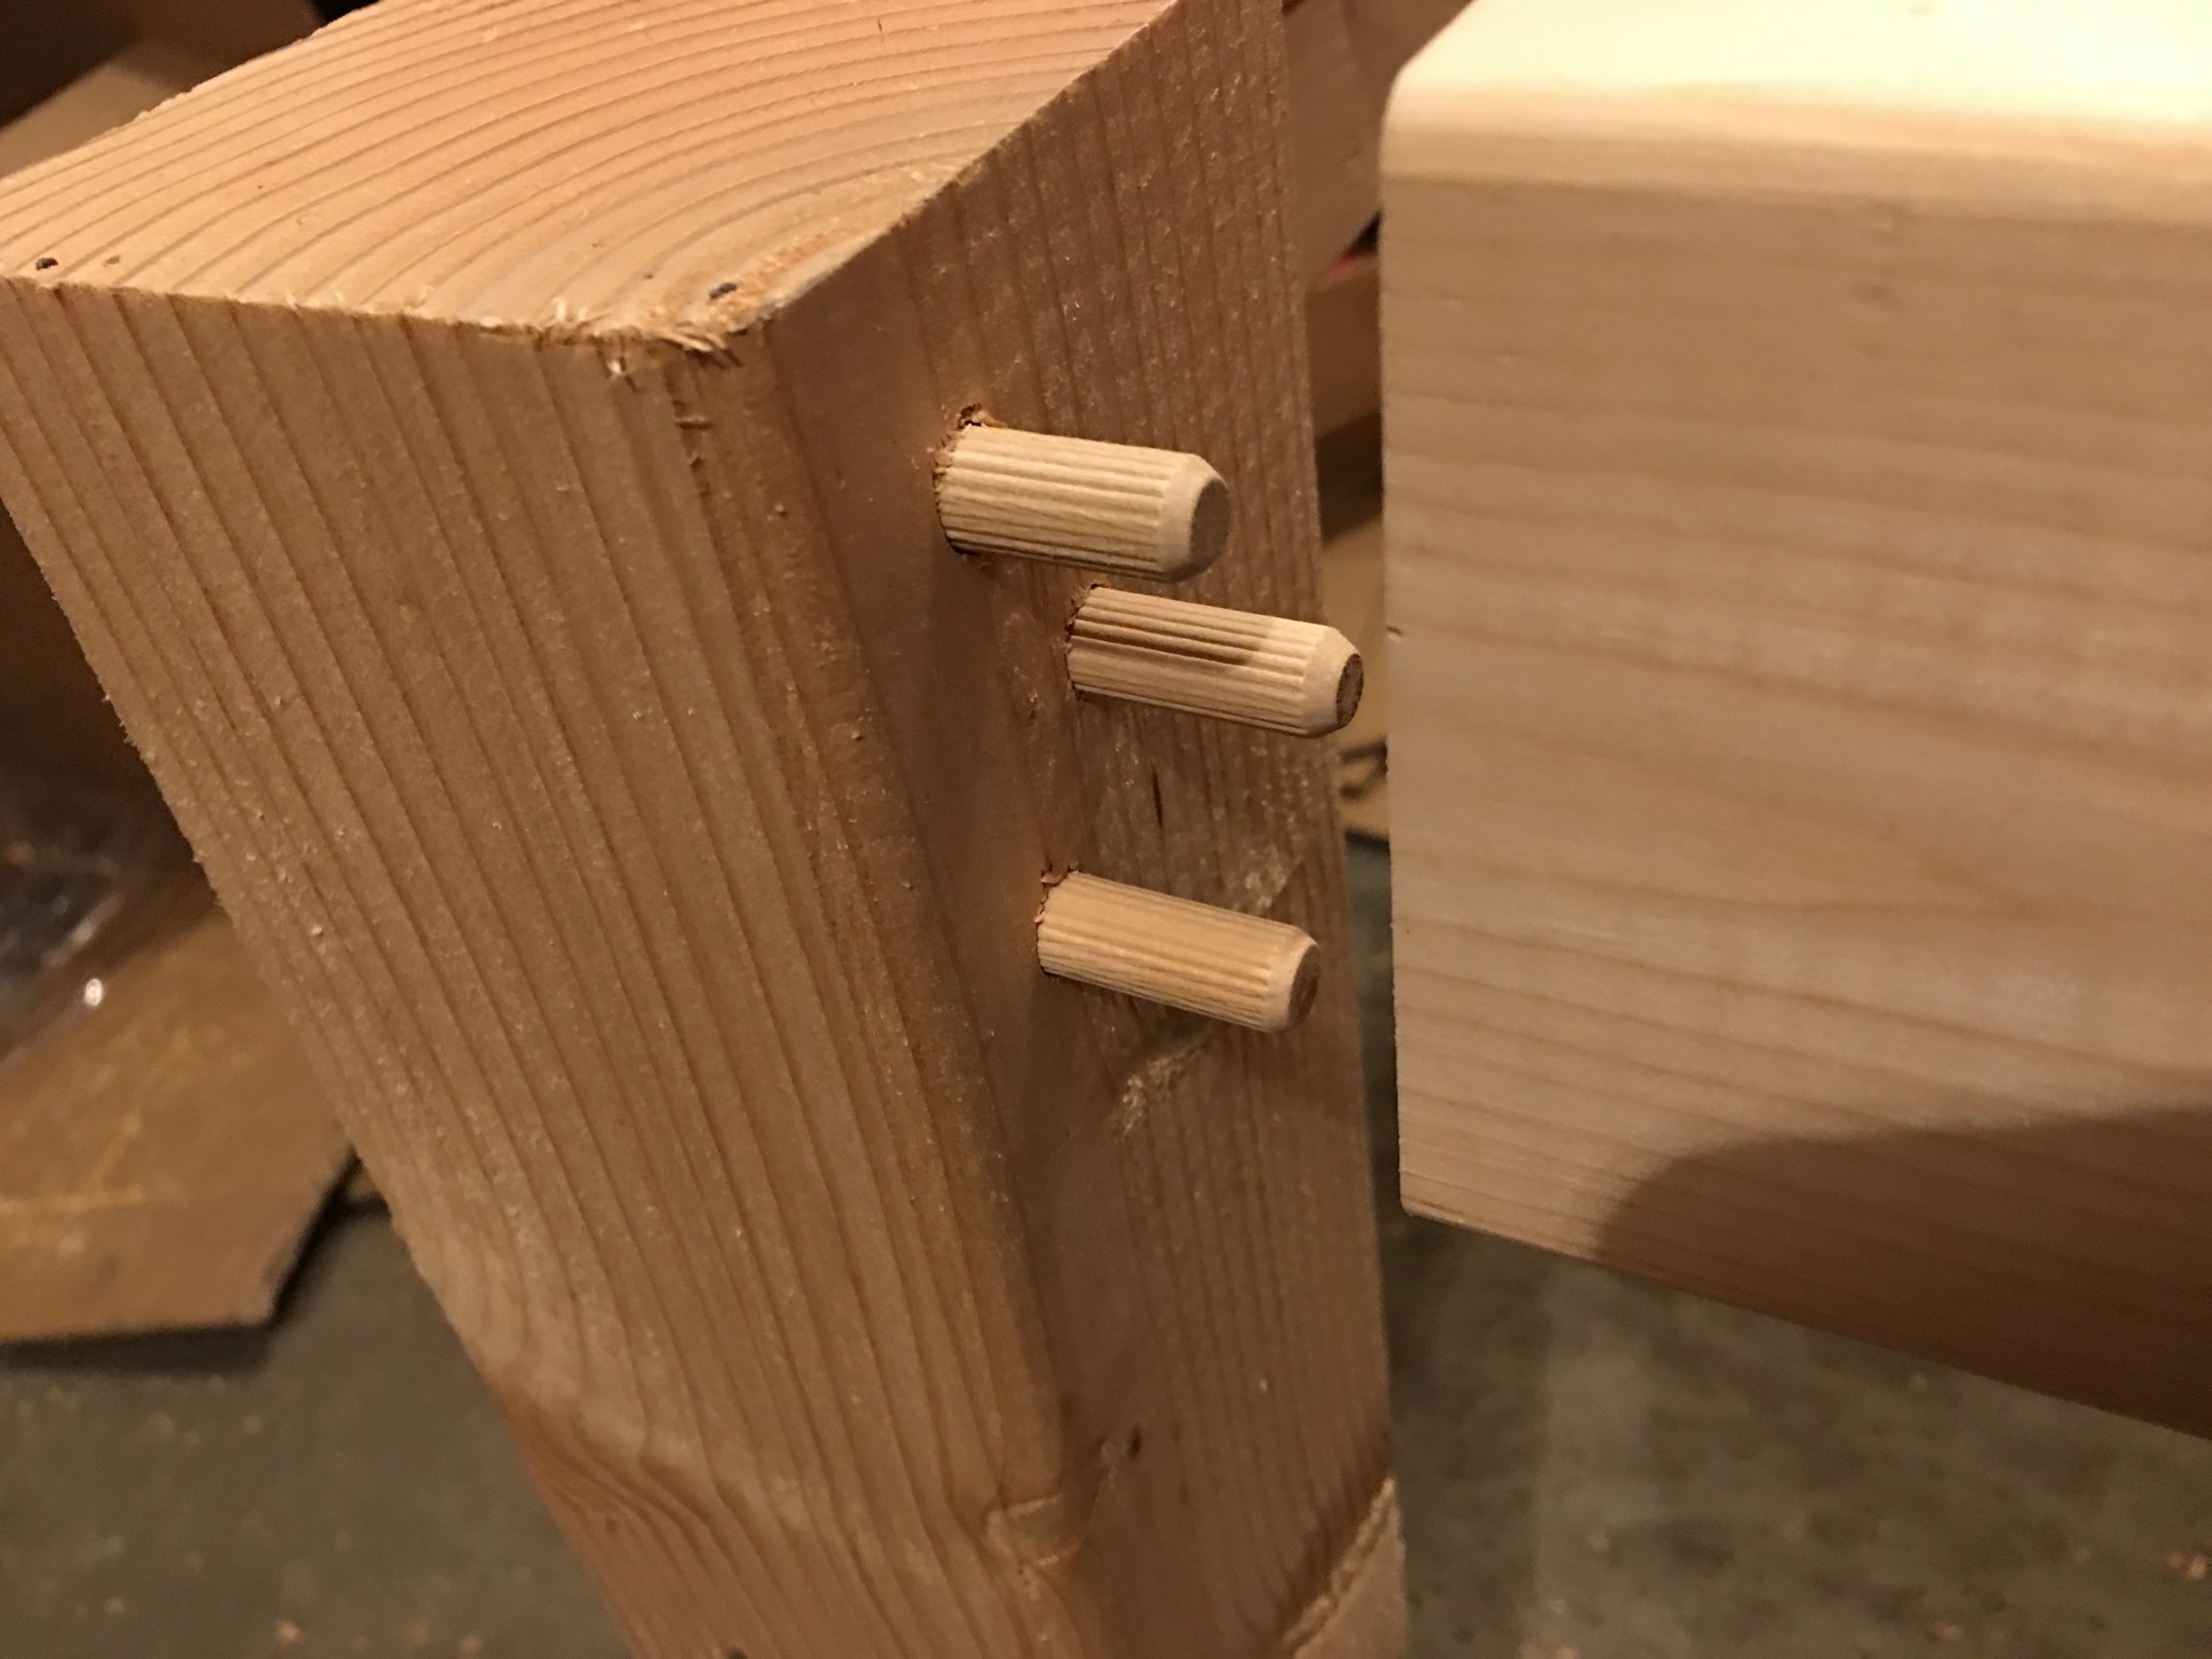
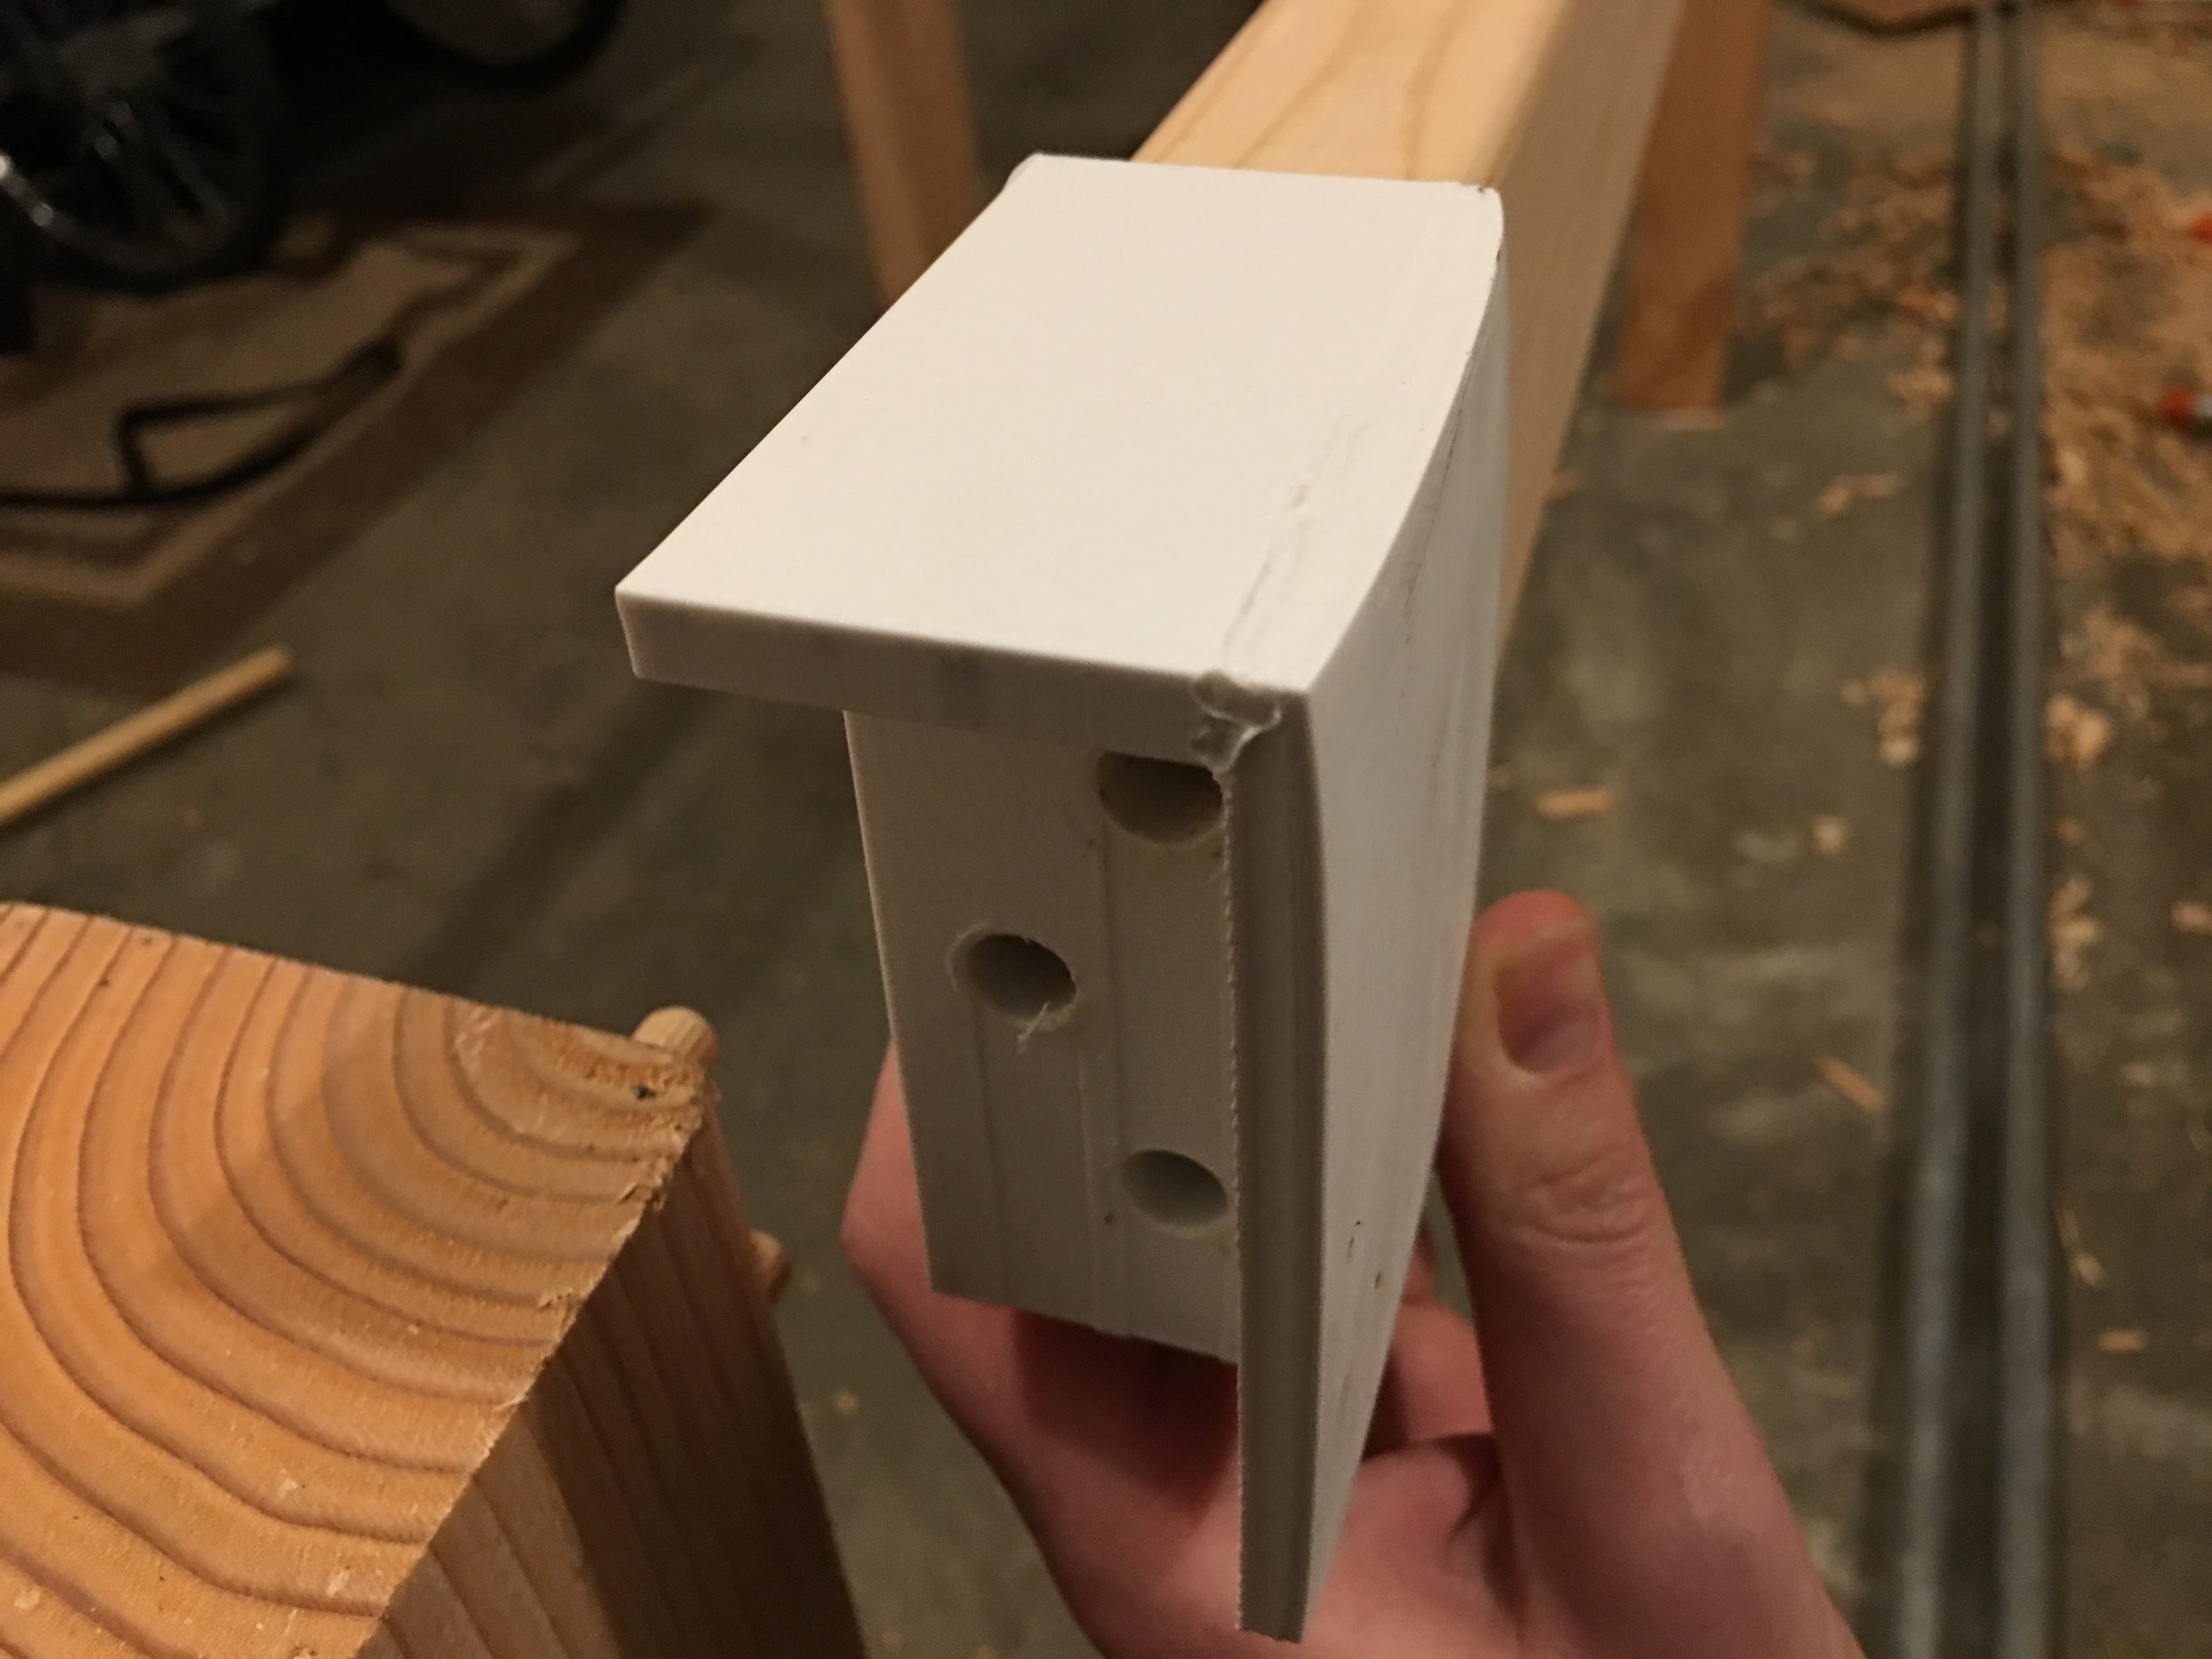
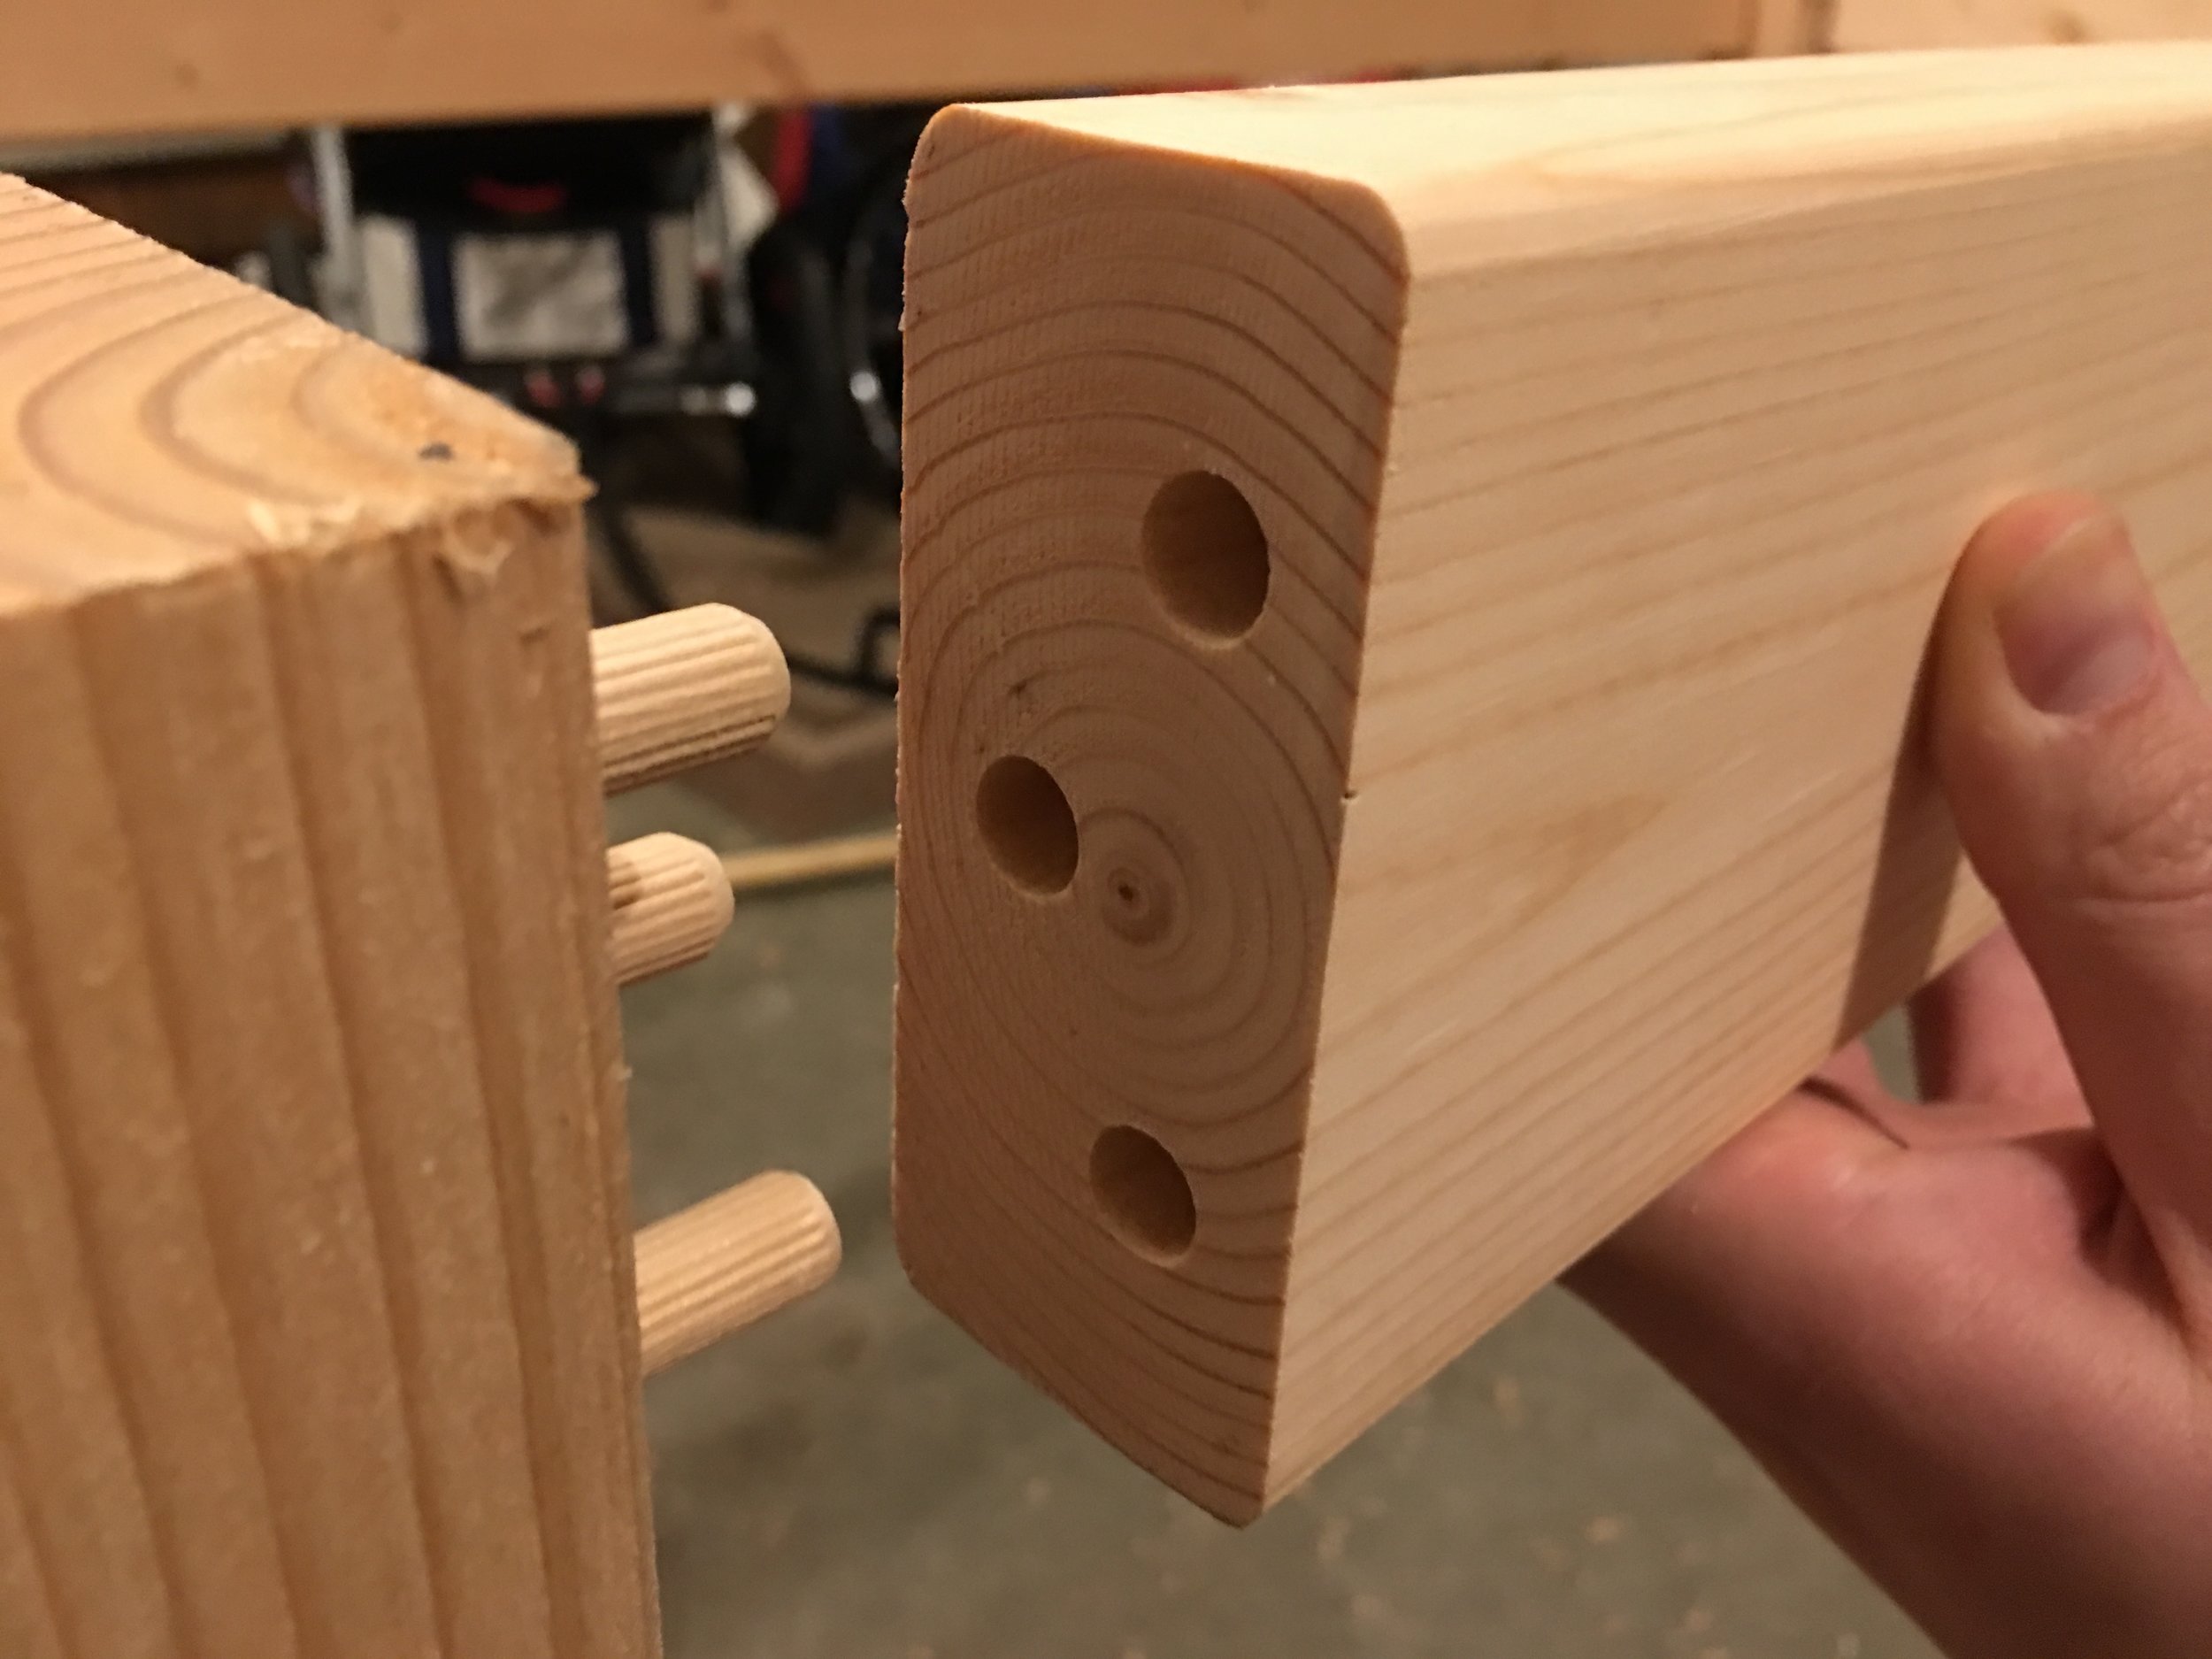
While clamping it is recommended, you can also just hold it firmly to be especially expedient.
Thanks for following along! Be sure to let me know what you think in the comments below.
